
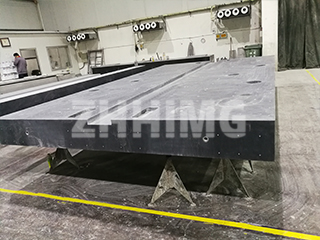
Granite platforms—including precision granite plates, inspection plates, and instrument platforms—are foundational tools in precision manufacturing, metrology, and quality control. Crafted from premium “Jinan Green” granite (a globally recognized high-performance stone) via CNC machining and hand lapping, these platforms boast a sleek black finish, dense structure, and uniform texture. Their core advantages—high strength (compressive strength ≥2500kg/cm²), Mohs hardness 6-7, and resistance to rust, acids, and magnetism—enable them to maintain ultra-high precision under heavy loads and normal temperature fluctuations. However, even the highest-quality granite platform will fail to deliver accurate results without proper leveling. As a leading global supplier of precision granite tools, ZHHIMG is committed to sharing professional leveling techniques, helping you maximize the performance of your granite platform.
1. Why Proper Leveling Is Critical for Granite Platforms
- Measurement Errors: Even a 0.01mm/m deviation from level can cause inaccurate readings when inspecting small workpieces (e.g., semiconductor components or precision gears).
- Uneven Load Distribution: Over time, unbalanced weight on the platform’s supports may lead to micro-deformation of the granite, permanently damaging its precision.
- Equipment Malfunction: For platforms used as CNC machine bases or CMM worktables, misleveling can cause excessive vibration, reducing tool life and machining accuracy.
2. Pre-Leveling Preparation: Tools & Setup
2.1 Essential Tools
| Tool | Purpose |
|---|---|
| Calibrated Electronic Level (0.001mm/m accuracy) | For high-precision leveling (recommended for Grade 0/00 platforms). |
| Bubble Level (0.02mm/m accuracy) | For rough leveling or routine checks (suitable for Grade 1 platforms). |
| Adjustable Granite Platform Stand | Must have load-bearing capacity ≥1.5x the platform’s weight (e.g., a 1000×800mm platform requires a 200kg+ stand). |
| Tape Measure (mm precision) | To center the platform on the stand and ensure even support distribution. |
| Hex Wrench Set | To adjust the stand’s leveling feet (compatible with the stand’s fasteners). |
2.2 Environmental Requirements
- Stable Surface: Install the stand on a solid concrete floor (not wooden or carpeted surfaces) to avoid vibration or sinking.
- Temperature Control: Conduct leveling in a room with stable temperature (20±2℃) and low humidity (40%-60%)—temperature fluctuations can cause temporary granite expansion/contraction, skewing readings.
- Minimal Vibration: Keep the area free from heavy machinery (e.g., CNC lathes) or foot traffic during leveling to ensure accurate measurements.
3. Step-by-Step Granite Platform Leveling Method
Step 1: Stabilize the Stand First
Step 2: Identify Primary & Secondary Support Points
- Primary Support Points: The middle point (A1) of the 3-point side, plus the two end points (A2, A3) of the 2-point side. These 3 points form an isosceles triangle, ensuring balanced load distribution.
- Secondary Support Points: The remaining 2 points (B1, B2) on the 3-point side. Lower these slightly so they do not contact the platform initially—they will be activated later to prevent platform deflection under load.
Step 3: Center the Platform on the Stand
Step 4: Recheck Stand Stability
Step 5: Precision Leveling with Electronic Level
- Place the Level: Set the calibrated electronic level on the platform’s working surface along the X-axis (lengthwise). Record the reading (N1).
- Rotate & Measure: Rotate the level 90° counterclockwise to align with the Y-axis (widthwise). Record the reading (N2).
- Adjust Primary Points Based on Readings:
- If N1 (X-axis) is positive (left side higher) and N2 (Y-axis) is negative (rear side higher): Lower A1 (middle primary point) by rotating its leveling foot clockwise, and raise A3 (rear primary point) counterclockwise.
- If N1 is negative (right side higher) and N2 is positive (front side higher): Raise A1 and lower A2 (front primary point).
- Repeat measurements and adjustments until N1 and N2 are both within ±0.005mm/m (for Grade 00 platforms) or ±0.01mm/m (for Grade 0 platforms).
Step 6: Activate Secondary Support Points
Step 7: Static Aging & Re-Inspection
Step 8: Establish Regular Leveling Checks
- Heavy Use (e.g., daily machining): Inspect and recalibrate every 3 months.
- Light Use (e.g., laboratory testing): Inspect every 6 months.
- Record all leveling data in a maintenance log—this helps track the platform’s long-term stability and identify potential issues early.
4. ZHHIMG’s Support for Granite Platform Leveling
- Pre-Calibrated Platforms: All ZHHIMG granite platforms undergo factory leveling before shipment—reducing on-site work for you.
- Custom Stands: We supply adjustable stands tailored to your platform’s size and weight, with anti-vibration pads to enhance stability.
- On-Site Leveling Service: For large-scale orders (5+ platforms) or Grade 00 ultra-precision platforms, our SGS-certified engineers provide on-site leveling and training.
- Calibration Tools: We offer calibrated electronic levels and bubble levels (compliant with ISO 9001) to ensure your in-house leveling is accurate.
5. FAQ: Common Granite Platform Leveling Questions
Q1: Can I level a granite platform without an electronic level?
Q2: What if my stand has only 4 support points?
Q3: How do I know if the secondary support points are properly tightened?
Post time: Aug-22-2025