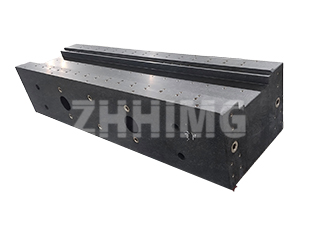
The granite surface plate is the ultimate zero reference point in dimensional metrology. However, the integrity of that reference—whether it’s a standard inspection model or a high-precision component like a black granite surface plate Series 517—is entirely dependent on rigorous care. For metrologists and quality control professionals, two questions remain paramount: What constitutes the best granite surface plate cleaner, and how often should the vital process of granite surface plate calibration occur?
The surface plate’s finely lapped surface is susceptible to contamination from environmental dust, oil residue, and abrasive particulate matter from workpieces. These contaminants, if left unchecked, embed into the porous granite, leading to premature wear and compromised flatness. Using the wrong cleaning solution—such as common industrial degreasers or chemicals with abrasive particles—can damage the surface faster than use itself. This is why selecting a dedicated granite surface plate cleaner is non-negotiable.
The best granite surface plate cleaner is one formulated specifically to lift and suspend particulate matter without leaving behind film or etching the granite. Professionals should always consult the granite surface plate cleaner SDS (Safety Data Sheet) to ensure the product is pH-neutral, non-toxic, and free from volatile organic compounds (VOCs) that could leave behind a residue. A quality cleaner facilitates the removal of contaminants and, when paired with a clean, lint-free cloth, restores the surface to its measurement-ready state, directly preserving the plate’s certified accuracy. ZHHIMG®, recognizing that optimal performance starts with a pristine surface, emphasizes this critical step as part of its comprehensive product lifespan guidance.
Beyond daily cleaning, the periodic re-verification of the plate’s flatness—the granite surface plate calibration—is essential. Even under ideal conditions, environmental drift, thermal cycles, and unavoidable usage patterns cause minute surface wear. A calibration schedule should be determined based on the plate’s grade (e.g., Grade 00 plates require more frequent checks than Grade B) and its usage frequency.
When searching for granite surface plate calibration near me, ensure the service provider utilizes instrumentation traceable to national standards, such as traceable laser interferometers and electronic levels, like the highly precise equipment utilized by ZHHIMG®’s expert teams. True calibration goes beyond a simple check; it involves professional re-lapping to restore the plate to its original certified flatness tolerance, a process that requires specialized skills that ZHHIMG®’s master craftsmen have honed over decades.
Furthermore, protection during periods of non-use is vital. A simple granite surface plate cover—made from a thick, non-abrasive material—plays a dual role: it shields the delicate surface from airborne contaminants and acts as a minor thermal buffer, protecting the plate from sudden temperature fluctuations. This simple measure drastically reduces the cleaning workload and extends the time between required re-lapping services.
Ultimately, achieving and sustaining ultra-precision is a commitment that extends far beyond the initial purchase of a high-quality surface plate. By meticulously selecting the appropriate granite surface plate cleaner, adhering to a strict granite surface plate calibration schedule, and using proper protective measures, manufacturers ensure that their metrology foundation remains a reliable, world-class reference point for years to come.
Post time: Nov-25-2025

