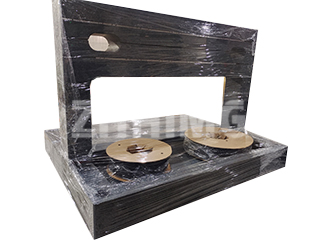
In the relentless pursuit of zero-defect manufacturing, dimensional inspection often hinges on the integrity of angular and perpendicular relationships. While the surface plate provides the foundational plane of flatness, ensuring that a workpiece’s features are perfectly perpendicular to that plane requires a specialized, equally stable reference tool. This is where the granite square, and its high-precision cousin, the granite tri square, cement their indispensable role in the metrology lab. These tools, alongside essential accessories like the granite base for dial gauge stands, represent the quiet assurance that angular measurements meet the most demanding tolerances.
Why Granite Dominates Dimensional Reference Tools
The choice of granite—specifically the high-density, black diabase—for these tools is a matter of physical necessity. Unlike steel squares or cast iron parallels, granite offers a unique combination of stability factors that make it the superior material for guaranteeing geometric truth:
-
Dimensional Stability: Granite possesses an exceptionally low Coefficient of Thermal Expansion (CTE), meaning slight temperature drifts within the lab environment do not induce measurable geometric distortion. A metallic square, by contrast, could subtly warp, compromising the crucial 90-degree angle.
-
Abrasive Wear Resistance: When measuring instruments or workpieces slide against the granite surface, the material wears by microscopic chipping rather than deformation or burring. This mechanism ensures that the critical reference edge or face maintains its geometric accuracy over an extended period.
-
Vibration Absorption: The natural crystalline structure and density of granite effectively dampens environmental vibrations. This is critical when conducting highly sensitive angular checks, ensuring the measurement is stable and reliable.
The certification of a granite square means it is verified to be within a few micro-inches of perfect perpendicularity (squareness) over its entire working height, guaranteeing its role as a precise master reference for machine tool alignment and product inspection.
The Role and Function of the Granite Tri Square
While a standard granite square often features two primary perpendicular faces, the granite tri square takes precision angular reference a step further. This unique tool features four, five, or even six precision ground faces that are all manufactured to be perfectly square to each other. This geometry makes it the ultimate tool for checking the alignment of machines—such as vertical machining centers or CMMs—where checking parallelism and perpendicularity across multiple axes is required.
Using a granite tri square allows engineers to perform comprehensive machine geometry checks that a simple square cannot handle. For instance, in a CMM setup, the tri-square can be placed on the surface plate to verify the Z-axis is truly perpendicular to the X-Y plane, and simultaneously check the parallelism of vertical ways. The high precision and stability of the tri-square prevent any doubt regarding the reference standard, isolating any measured error to the machine tool itself rather than the inspection device. Available in various sizes, the tri-square is essential for achieving the highest levels of angular accuracy demanded by industries like aerospace and medical device manufacturing.
Stabilizing the Reading: The Granite Base for Dial Gauge Stands
Accuracy in dimensional metrology is not just about the reference plane; it is equally about the stability of the measuring instrument itself. The granite base for dial gauge stands and height gauges serves as the critical interface between the reading instrument and the main surface plate.
Why use a granite base instead of a metal one? The answer lies in mass and stability. A massive granite base provides superior rigidity and vibration dampening for the gauge stand, ensuring that minute movements or external vibrations do not translate into erroneous fluctuations on the dial indicator. Furthermore, the inherent flatness of the base itself ensures that the gauge’s column is held perpendicular to the surface plate across its entire travel. This is particularly vital in comparative measurements, where the dial gauge must track a feature over a distance, and any slight rock or instability in the stand’s base would introduce cosine error or tilt into the reading. The stability afforded by a purpose-built granite base for dial gauge equipment enhances the repeatability and confidence of every measurement taken.
Investment in Geometric Integrity
The cost of these granite reference tools, while higher than their metal counterparts, represents a sound investment in geometric integrity. These tools have an exceptionally long lifespan, provided they are handled and stored correctly. They do not rust, and their superior wear characteristics mean their initial accuracy certification holds true for years, often decades.
The true cost factor to consider is the cost of error. Relying on an uncertified steel square or an unstable metal gauge stand can lead to systemic angular errors in produced parts. This results in costly rework, increased scrap, and ultimately, a loss of customer confidence. Investing in a certified granite tri square for machine alignment and using a reliable granite base for dial gauge stands mitigates these risks by providing an unambiguous, stable reference point.
In short, the granite square and its related metrology tools are not simply accessories; they are non-negotiable standards that validate the perpendicularity of the manufacturing process. They are the silent sentinels of angular accuracy, ensuring that the components leaving the shop floor meet the exacting geometric specifications required by modern industry.
Post time: Dec-04-2025

