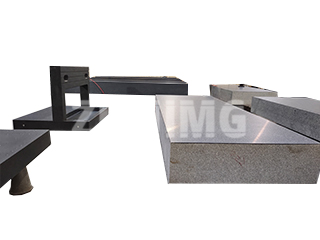
In the world of ultra-precision metrology, the granite measuring tool—such as a surface plate, straightedge, or master square—is the absolute planar reference. These tools, expertly finished by machine and dedicated hand-lapping, owe their stability and accuracy to the dense, naturally aged stone they are made from. However, the lifespan and maintained accuracy of these critical instruments are not guaranteed; they are the result of controlled environments and meticulous operational practices.
At ZHONGHUI Group (ZHHIMG®), we recognize that while our high-density granite provides an exceptional foundation, several user-side factors directly influence how long a precision tool retains its certified accuracy. Understanding these elements is key to protecting your investment.
The Primary Threats to Granite Longevity
The degradation of a granite measuring platform often stems from mechanical and environmental stresses rather than material failure.
- Improper Load Distribution: Excessive or uneven pressure, especially when concentrated on one area of the platform, can lead to localized wear or even minor, long-term deformation. This is often seen when heavy workpieces are repeatedly placed on the same spot, causing the component’s working surface to lose its ideal flatness.
- Environmental Contamination: A single chip, metal shaving, or abrasive dust particle can act like sandpaper between the granite and the workpiece. An unclean work environment not only immediately introduces measurement errors but drastically accelerates the surface wear of the granite, directly reducing its accurate service life.
- Workpiece Material and Surface Quality: The composition and finish of the material being measured play a significant role in wear rates. Softer materials like copper and aluminum cause less abrasion, while hard materials, notably cast iron, can subject the granite to measurably greater wear. Furthermore, workpieces with poor surface roughness (a coarse finish) are prone to scratching the finely lapped granite platform, permanently damaging the reference plane.
- Operational Misuse and Abrasive Contact: The inherent low surface hardness of granite, while beneficial for its non-magnetic and non-corrosive properties, makes it susceptible to wear from friction. Techniques such as excessive back-and-forth movement of a workpiece or reference tool across the surface—rather than lifting and placing—introduce friction that rapidly degrades the granite’s top layer. This confirms the rule: granite measuring tools are instruments, not workbenches.
Precision Manufacturing: The Mandate for Auxiliary Machinery
The creation of a high-quality, high-accuracy granite measuring tool relies just as heavily on the precision of the auxiliary processing machinery as it does on the stone itself.
To ensure the dimensional accuracy of the final product, every component of the stone processing machinery must be maintained to metrology standards. This requires repeated checking of machine assembly dimensions and strict adherence to technical cleanroom practices. Before any formal stone processing begins, the equipment must undergo a trial run to confirm normal function. Faulty machine operation not only risks damage but can lead to the waste of valuable, selected granite material.
Maintaining the machinery’s internal components—from the spindle box to the lifting mechanisms—is critical. Lubrication must be applied precisely to all mating surfaces, including bearings and lead screw assemblies, before any operation. Connections must be free of marks or burrs, and any internal rust or contamination must be meticulously cleaned and treated with anti-rust coatings to prevent foreign material from compromising the grinding process.
The Critical Role of Mechanical Assembly Quality
The quality of the machinery used to process the granite is directly linked to the stability of the final granite product. This demands rigorous attention to mechanical assembly details:
- Bearing and Seal Integrity: Bearings must be thoroughly cleaned to remove anti-rust agents and checked for smooth rotation before assembly. Force applied during bearing installation must be even, symmetrical, and appropriate, avoiding stress on the raceways and ensuring the end face is perpendicular to the shaft. Seals must be pressed parallel into their grooves to prevent twisting, which would introduce play and instability into the processing machine.
- Alignment of Motion Systems: For components like pulley systems, the axes must be perfectly parallel and aligned to prevent uneven tension, belt slippage, and accelerated wear—all of which lead to vibration that compromises the precision lapping of the granite. Similarly, the flatness and true contact of mating surfaces on machine connections must be verified and repaired if any deformation or burrs are detected.
In summary, the granite measuring tool is a durable but finely tuned reference standard. Its exceptional lifespan is a product of high-quality ZHHIMG® black granite, combined with stringent control over operational cleanliness, proper workpiece handling, and the meticulous maintenance of the precision machinery that brings it to its final, certified accuracy.
Post time: Oct-30-2025

