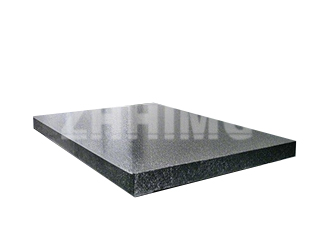
A granite surface plate is the ultimate reference plane in metrology, but its accuracy—often verified down to the nanometer—can be entirely compromised by improper installation. The process is not a casual setup; it is a meticulous, multi-step alignment that secures the geometric integrity of the instrument. At ZHONGHUI Group (ZHHIMG®), we emphasize that securing the granite is as important as the precision lapping itself.
This guide provides the definitive steps and necessary precautions for successfully installing your precision surface plate, ensuring it performs exactly to its certified grade.
Meticulous Preparation: Setting the Stage for Accuracy
Before any granite is moved, the environment must be controlled. The installation site must be clean, dry, and free of airborne contaminants such as dust and oil mist, which can settle and interfere with the final leveling process. Maintaining the recommended temperature and humidity levels is critical, as extreme fluctuations can induce temporary, performance-degrading thermal stress in the granite mass.
Tools must also be prepared to the same high standard. Beyond standard wrenches and screwdrivers, you must have certified, high-precision instruments on hand: a sensitive electronic level (like a WYLER or equivalent), a laser interferometer, or a highly accurate autocollimator for final verification. Using low-precision tools during setup introduces errors that negate the granite’s inherent accuracy. Finally, a comprehensive visual and dimensional inspection of the granite surface plate must confirm that the plate arrived free of handling damage, cracks, or loose texture, and that its certified flatness is still within tolerance.
The Installation Rigor: Leveling and Stress Control
The installation process transforms the granite block from a component into a stable reference instrument.
First, determine the exact location, ensuring the supporting sub-floor or machine foundation is flat and stable. The surface plate must be placed on its designated support system—typically three support points located at the plate’s calculated Airy points or specified four points for larger plates. Never rest a precision plate on more support points than specified, as this induces non-uniform stress and distorts the flatness.
The crucial next step is leveling. Using the high-precision electronic level, the supports must be adjusted to bring the plate to a truly horizontal plane. While the local levelness of a surface plate doesn’t directly affect its inherent flatness, achieving perfect levelness is crucial for the stability of gaging equipment that relies on gravity (like spirit levels or plumb references) and for verifying the plate’s foundational accuracy.
Once positioned, the plate is secured. If anchor bolts or washers are used, the fixing force must be evenly distributed. Excessive localized tightening is a common mistake that can permanently deform the granite. The goal is to secure the plate without inducing stress that pulls it out of its manufactured plane.
The Final Validation: Accuracy Verification
Installation is only complete after accuracy verification. Using the laser interferometer or other high-precision metrology equipment, the plate’s overall flatness and repeatability across its entire surface must be checked against its original calibration certificate. This step confirms that the act of installation has not compromised the granite surface plate’s geometric integrity. Regular inspection of the setup—including checking the bolt torque and levelness—is essential to catch any shifts caused by floor settling or heavy vibration over time.
For any personnel new to handling these critical components, we strongly recommend comprehensive technical training to ensure they fully appreciate the material characteristics and the rigorous methods necessary to preserve the micro-level precision inherent in ZHHIMG® products.
Post time: Oct-30-2025

