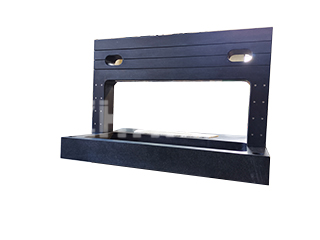
In the high-precision manufacturing industry, granite surface plates are widely regarded as the cornerstone of accurate measurement. From semiconductor fabrication to precision CNC machining, these platforms provide a flat, stable reference surface critical for reliable operations. However, the precision of a granite plate depends not only on its material quality but also on proper installation—a factor that industry experts are increasingly highlighting.
Recent reports from leading metrology facilities emphasize the importance of verifying installation stability immediately after placing a granite surface plate. Even the heaviest and densest plates can experience subtle shifts if not correctly supported, potentially leading to measurement errors or reduced operational efficiency. Engineers note that while granite’s natural density provides inherent stability, it does not entirely eliminate the risk of tilting or edge lifting, especially in dynamic industrial environments.
One facility in East Asia recently conducted a comprehensive assessment of newly installed granite plates and discovered that even minor unevenness in support stands could affect measurement accuracy by microns. This prompted an industry-wide discussion on installation verification methods and best practices. High-precision laboratories now increasingly adopt a combination of visual inspections, precision leveling, and dynamic vibration assessments to ensure plates are securely anchored and properly aligned.
Experts highlight that a granite surface plate’s installation must account for several factors. The support structure should evenly distribute the plate’s weight while dampening vibrations from nearby equipment. Leveling adjustments must be precise, particularly for larger plates, to avoid slight tilting that could compromise measurement results. Furthermore, periodic checks over time are essential, as environmental changes, frequent handling, or heavy workloads may cause subtle loosening or misalignment.
The growing adoption of advanced electronic levels and laser interferometers has also improved the ability to monitor installation stability. These tools allow technicians to detect micrometer-level deviations in flatness or alignment, providing immediate feedback for corrective action. Combined with routine visual inspections and vibration tests, they form a comprehensive approach to maintaining both safety and precision.
Industry leaders emphasize that ensuring stable installation goes beyond preserving measurement accuracy—it also protects the longevity of the granite surface plate. Uneven support or loosened fixtures can create stress points, leading to chipping or micro-cracks over time. As a result, companies are increasingly treating installation verification as an integral part of their quality management systems, ensuring that granite plates remain reliable for years of continuous use.
The importance of stable installation is further underscored in environments where high-speed machinery and delicate electronic measurement equipment coexist. Even minimal vibrations transmitted to the granite platform can lead to errors in semiconductor production or precision assembly processes. By securing plates properly, facilities mitigate these risks while maintaining the integrity of critical measurements.
Experts agree that the industry is moving toward standardizing installation verification procedures. From careful alignment and leveling during initial placement to regular inspections and vibration assessments, manufacturers are implementing protocols that reflect the high-precision demands of modern industrial operations. This shift not only ensures operational efficiency but also reinforces confidence in measurement results across various sectors, from electronics to aerospace.
In conclusion, while granite surface plates are inherently stable due to their density and precision engineering, proper installation remains a crucial factor in maintaining accuracy and longevity. Facilities that prioritize thorough verification—through leveling, visual inspection, and dynamic testing—can prevent potential issues such as tilting, edge lifting, or gradual loosening. As the demand for ultra-precise measurements grows, understanding and implementing best practices for plate installation has become a key component of industrial success.
Post time: Sep-26-2025

