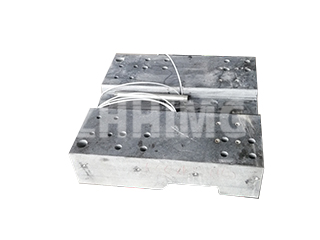
In the world of precision manufacturing, the stability and accuracy of granite measuring tools are paramount. This article will delve into the methods of flatness inspection, essential daily maintenance, and the unique technical advantages that make ZHHIMG® a leader in this field.
Granite measuring tools have become the ideal replacement for their metal counterparts due to their superior physical properties, including high density, exceptional stability, corrosion resistance, and non-magnetic nature. However, even the most durable granite requires scientific maintenance and professional calibration to consistently maintain its micron- and even nanometer-level accuracy over time.
Daily Maintenance and Usage Tips for Granite Measuring Tools
Proper use and routine maintenance are the first steps to extending the lifespan and ensuring the accuracy of your granite measuring tools.
- Environmental Control: Granite measuring tools should always be used and stored in a temperature- and humidity-controlled environment. At ZHHIMG®, we operate a 10,000 m² climate-controlled workshop with a military-grade, 1,000mm-thick concrete floor and surrounding anti-vibration trenches, ensuring the measurement environment is absolutely stable.
- Precise Leveling: Before any measurement begins, it is essential to level the granite measuring tool using a high-precision instrument, such as a Swiss WYLER electronic level. This is the prerequisite for establishing an accurate reference plane.
- Surface Cleaning: Before each use, the working surface should be wiped with a clean, lint-free cloth to remove any dust or debris that could affect measurement results.
- Careful Handling: When placing workpieces on the surface, handle them with care to avoid impact or friction that could damage the surface. Even a minor chip can compromise the flatness and lead to measurement errors.
- Proper Storage: When not in use, avoid using the granite surface plate as a storage platform for tools or other heavy objects. Prolonged, uneven pressure on the surface can degrade the flatness over time.
Granite Measuring Tool Flatness Repair and Calibration
When a granite measuring tool deviates from its required flatness due to an accident or prolonged use, professional repair is the only way to restore its precision. Our artisans at ZHHIMG® have mastered the most advanced repair techniques to ensure every calibration meets the highest standards.
Repair Method: Manual Lapping
We use manual lapping for repairs, a process that demands a high level of skill. Our senior technicians, many with over 30 years of experience, possess the remarkable ability to feel precision down to the micron level. Customers often refer to them as “walking electronic levels” because they can intuitively gauge how much material to remove with each pass.
The repair process typically includes:
- Rough Lapping: Using a lapping plate and abrasive compounds to perform an initial grind, achieving a fundamental level of flatness.
- Semi-Finish and Finish Lapping: Progressively using finer abrasive media to remove deeper scratches and elevate the flatness to a more precise level.
- Real-Time Monitoring: Throughout the lapping process, our technicians utilize high-precision equipment, including German Mahr indicators, Swiss WYLER electronic levels, and a UK Renishaw laser interferometer, to constantly monitor flatness data, ensuring a perfectly controlled and precise outcome.
Methods for Granite Flatness Inspection
After a repair is complete, it must be verified with professional inspection methods to ensure the flatness meets the required specifications. ZHHIMG® adheres to strict international metrology standards, including German DIN, American ASME, Japanese JIS, and Chinese GB, to guarantee the accuracy of every product. Here are two common inspection methods:
- Indicator and Surface Plate Method
- Principle: This method uses a known flat reference plate as a benchmark for comparison.
- Process: The workpiece to be inspected is placed on the reference plate. An indicator or probe is attached to a movable stand, and its tip touches the surface of the workpiece. As the probe moves across the surface, readings are recorded. By analyzing the data, the flatness error can be calculated. Our measurement tools are all calibrated and certified by national metrology institutes to ensure accuracy and traceability.
- Diagonal Test Method
- Principle: This classic test method uses one diagonal line on the granite plate as the reference. The flatness error is determined by measuring the minimum distance between two points on the surface that are parallel to this reference plane.
- Process: Skilled technicians use high-precision instruments to collect data from multiple points on the surface, following the diagonal principle for calculation.
Why Choose ZHHIMG®?
As a synonym for industry standards, ZHHIMG® is more than just a manufacturer of granite measuring tools; we are a provider of ultra-precision solutions. We use our exclusive ZHHIMG® Black Granite, which boasts superior physical properties. We are also the only company in our industry to hold comprehensive ISO 9001, ISO 45001, ISO 14001, and CE certifications, ensuring every step of our process—from material selection to final inspection—adheres to the highest standards.
We live by our quality policy: “The precision business can’t be too demanding.” This is not just a slogan; it’s our promise to every customer. Whether you require custom granite measuring tools, repair, or calibration services, we offer the most professional and reliable solutions.
Post time: Sep-30-2025

