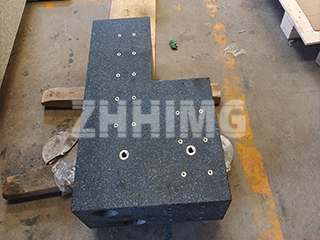
Granite measuring tools—such as surface plates, angle plates, and straightedges—are critical for achieving high-precision measurements in manufacturing, aerospace, automotive, and precision engineering industries. Their exceptional stability, low thermal expansion, and wear resistance make them indispensable for calibrating instruments, inspecting workpieces, and ensuring dimensional accuracy. However, maximizing their lifespan and retaining their precision relies on correct operational practices and systematic maintenance. This guide outlines industry-proven protocols to protect your granite tools, avoid costly errors, and optimize measurement reliability—essential knowledge for precision measurement manufacturers and quality control teams.
- Accelerated wear of measuring surfaces: The dynamic friction between moving workpieces and granite tools can scratch or degrade the tool’s precision-finished surface, compromising long-term accuracy.
- Severe safety hazards: For operators using external calipers or probes with granite bases, unstable workpieces may catch the tool. In casting applications, porous surfaces (e.g., gas holes, shrinkage cavities) can trap caliper jaws, pulling the operator’s hand into moving parts—resulting in injuries or equipment damage.
- Clean the granite tool’s measuring surface with a lint-free microfiber cloth dampened with a non-abrasive, pH-neutral cleaner (avoid harsh solvents that can etch granite).
- Wipe the workpiece’s measured surface to remove debris—even microscopic particles can create gaps between the workpiece and granite, leading to inaccurate readings (e.g., false positive/negative deviations in flatness checks).
- Separate from cutting tools and heavy equipment: Never stack granite tools with files, hammers, turning tools, drills, or other hardware. Impact from heavy tools can cause internal stress or surface damage to granite.
- Avoid placement on vibrating surfaces: Do not leave granite tools directly on machine tool tables or workbenches during operation. Machine vibration can cause the tool to shift or fall, leading to chips or structural damage.
- Use dedicated storage solutions: For portable granite tools (e.g., small surface plates, straightedges), store them in padded, rigid cases with foam inserts to prevent movement and absorb shocks. Fixed tools (e.g., large surface plates) should be mounted on vibration-dampening bases to isolate them from floor vibrations.
- Do not use granite straightedges as scribing tools (for marking lines on workpieces); this scratches the precision surface.
- Never use granite angle plates as “small hammers” to tap workpieces into position; impact can crack the granite or distort its angular tolerance.
- Avoid using granite surface plates to scrape away metal shavings or as a support for tightening bolts—abrasion and pressure will degrade their flatness.
- Refrain from “fidgeting” with tools (e.g., spinning granite probes in hands); accidental drops or impacts can disrupt internal stability.
- Ideal measurement temperature: Conduct precision measurements at 20°C (68°F)—the international standard for dimensional metrology. For workshop environments, ensure the granite tool and workpiece are at the same temperature before measuring. Metal workpieces heated by machining (e.g., from milling or welding) or cooled by coolants will expand or contract, leading to false readings if measured immediately.
- Avoid heat sources: Never place granite tools near heat-generating equipment such as electric furnaces, heat exchangers, or direct sunlight. Prolonged exposure to high temperatures causes thermal deformation of the granite, altering its dimensional stability (e.g., a 1m granite straightedge exposed to 30°C can expand by ~0.008mm—enough to invalidate micron-level measurements).
- Acclimate tools to the environment: When moving granite tools from a cold storage area to a warm workshop, allow 2–4 hours for temperature equilibration before use.
- Magnetize metal components attached to granite tools (e.g., clamps, probes), causing metal shavings to adhere to the granite surface.
- Disrupt the accuracy of magnetic-based measuring instruments (e.g., magnetic dial indicators) used with granite bases.
Post time: Aug-21-2025

