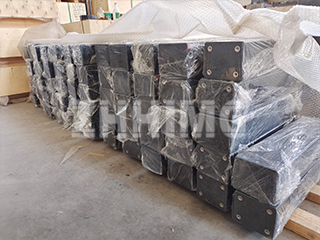
As a critical metrology tool crafted from high-hardness, high-density natural granite (also known as marble straightedge in industrial contexts), high-precision granite straightedges play an indispensable role in precision inspection across multiple industries. Designed for measuring geometric accuracy, they are widely utilized in verifying the flatness of linear guides, precision workpieces, and other high-tolerance components—with a primary focus on parallelism measurement and straightness measurement.
1. Precision Grades: Meeting Global Standards
Adhering to the latest industrial standards, our granite straightedges achieve Grade 00 precision on both top and bottom surfaces (for parallelism and perpendicularity). For export markets, we also offer customized versions that meet international standards (e.g., DIN, ISO), with Grade 00 precision on all four surfaces—ensuring compatibility with global manufacturing and inspection workflows.
2. Core Applications: Solving Precision Inspection Challenges
2.1 Linear Guide Straightness Measurement
Granite straightedges are ideal for verifying the straightness of linear guides (common in CNC machines, robotics, and precision automation). The measurement process leverages the light gap method:
- Place the granite straightedge on the linear guide to be tested, ensuring full and tight contact between the two surfaces.
- Move the straightedge slightly along the guide’s length.
- Observe the light gap between the straightedge and the guide surface—any uneven light distribution directly indicates straightness deviations, allowing for quick and accurate error assessment.
2.2 Marble Surface Plate Flatness Inspection
In scenarios where advanced instruments (e.g., levels, dial indicators) are unavailable, high-precision granite straightedges serve as a reliable alternative for inspecting the flatness of marble surface plates. The operation steps are as follows:
- Apply a uniform layer of inspection dye (e.g., Prussian blue) to the precision surface of the granite straightedge.
- Move the straightedge slowly along the diagonal lines of the marble surface plate.
- After moving, count the number of dye transfer points left on the plate. The density and distribution of these points directly determine the flatness grade of the marble surface plate—providing a cost-effective and efficient inspection solution.
3. Critical Usage Tips for Accurate Results
To ensure the reliability of inspection data, follow these best practices when using high-precision granite straightedges:
- Pre-Use Cleaning: Thoroughly wipe the straightedge’s precision surface with a lint-free cloth to remove dust, oil, or debris—any foreign matter can distort measurement results.
- Workpiece Placement: Place the workpiece to be inspected on a high-precision granite workbench (recommended for its stable, non-magnetic, and vibration-resistant properties). This minimizes external interference and ensures consistent inspection conditions.
Why Choose ZHHIMG’s High-Precision Granite Straightedges?
- Superior Material Properties: Natural granite offers excellent wear resistance, thermal stability, and corrosion resistance—ensuring long-term precision retention (no deformation even after years of use).
- Global Standard Compliance: Our products meet both domestic and international precision standards, supporting seamless integration into your global supply chain.
- Customization Capabilities: We offer tailored solutions (e.g., size, precision grade, surface treatment) to meet your specific industry needs (automotive, aerospace, electronics, etc.).
For inquiries about product specifications, pricing, or custom orders, please contact our sales team today—we’re ready to provide professional technical support and personalized solutions for your precision inspection requirements.
Post time: Aug-23-2025

