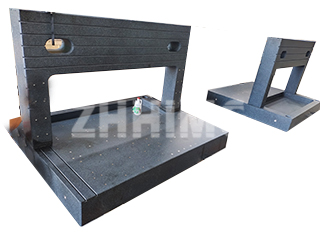
Marble and granite mechanical components play a crucial role in precision machinery, measurement systems, and laboratory equipment. Although granite has largely replaced marble in high-end applications due to its superior physical stability, marble mechanical components are still used in certain industries for their cost-effectiveness and ease of processing. To ensure these components perform reliably, strict inspection standards must be followed for both appearance and dimensional accuracy before delivery and installation.
Appearance inspection focuses on identifying any visible defects that could compromise the component’s function or aesthetics. The surface should be smooth, uniform in color, and free from cracks, scratches, or chipping. Any irregularities such as pores, impurities, or structural lines must be carefully examined under adequate lighting. In high-precision environments, even a minor surface flaw may affect the accuracy of assembly or measurement. Edges and corners must be precisely formed and properly chamfered to prevent stress concentration and accidental damage during handling or operation.
Dimensional inspection is equally important, as it directly affects the assembly and performance of the mechanical system. Measurements such as length, width, thickness, and hole position must strictly conform to the specified tolerances on the engineering drawing. Precision tools like digital calipers, micrometers, and coordinate measuring machines (CMM) are commonly used to verify dimensions. For high-precision marble or granite bases, flatness, perpendicularity, and parallelism are checked using electronic levels, autocollimators, or laser interferometers. These inspections ensure the component’s geometric accuracy meets the international standards such as DIN, JIS, ASME, or GB.
The inspection environment also plays a critical role in accuracy. Temperature and humidity fluctuations can cause micro-expansion or contraction in stone materials, leading to measurement errors. Therefore, dimensional inspection should be performed in a temperature-controlled room, ideally at 20°C ±1°C. All measuring instruments must be calibrated regularly, with traceability to national or international metrology institutes to guarantee reliability.
At ZHHIMG®, all mechanical components—whether made of granite or marble—undergo a comprehensive inspection process before shipping. Each component is tested for surface integrity, dimensional precision, and compliance with the client’s technical requirements. Using advanced instruments from Germany, Japan, and the UK, along with professional metrology expertise, our engineers ensure every product meets or exceeds industry standards. This meticulous approach ensures that ZHHIMG® mechanical components maintain consistent quality, stability, and long-term performance in demanding applications.
Through rigorous appearance and dimensional inspection, marble mechanical components can deliver the precision and reliability essential to modern industry. Proper inspection not only verifies quality but also reinforces the credibility and durability that clients expect from world-class precision manufacturers.
Post time: Oct-27-2025

