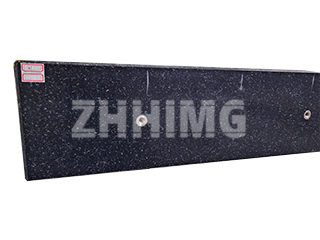
In ultra-precision engineering, the granite component is the ultimate reference body, providing the foundation of stability for instruments operating at the micro and nanometer scales. However, even the most inherently stable material—our ZHHIMG® high-density black granite—can only deliver its full potential if the measurement process itself is managed with scientific rigor.
How do engineers and metrologists ensure the measurement results are truly accurate? Achieving accurate, repeatable results during the inspection and final verification of granite machine bases, air bearings, or CMM structures demands strict attention to detail before the measuring instrument touches the surface. This preparation is often as critical as the measuring equipment itself, ensuring that the results genuinely reflect the component’s geometry, not environmental artifacts.
1. The Critical Role of Thermal Conditioning (The Soak-Out Period)
Granite has an exceptionally low Coefficient of Thermal Expansion (COE), especially compared to metals. Yet, any material, including high-density granite, must be thermally stabilized to the ambient air and the measuring instrument before verification can begin. This is known as the soak-out period.
A large granite component, especially one recently moved from a factory floor to a dedicated metrology lab, will carry thermal gradients—differences in temperature between its core, surface, and base. If measurement begins prematurely, the granite will slowly expand or contract as it equalizes, leading to continuous drift in readings.
- The Rule of Thumb: Precision components must reside in the measurement environment—our temperature and humidity-controlled cleanrooms—for an extended period, often 24 to 72 hours, depending on the component’s mass and thickness. The objective is to achieve thermal equilibrium, ensuring the granite component, the measuring device (such as a laser interferometer or electronic level), and the air are all at the internationally recognized standard temperature (usually 20℃).
2. Surface Selection and Cleaning: Eliminating the Enemy of Accuracy
Dirt, dust, and debris are the single greatest enemies of accurate measurement. Even a microscopic particle of dust or a residual fingerprint can create a stand-off height that falsely indicates an error of several micrometers, severely compromising the measurement of flatness or straightness.
Before any probe, reflector, or measuring instrument is placed on the surface:
- Thorough Cleaning: The component surface, whether it is a reference plane or a mounting pad for a linear rail, must be meticulously cleaned using a suitable, lint-free wipe and a high-purity cleaning agent (often industrial alcohol or dedicated granite cleaner).
- Wipe Down the Tools: Equally important is the cleaning of the measuring tools themselves. Reflectors, instrument bases, and probe tips must be spotless to ensure perfect contact and a true optical path.
3. Understanding Support and Stress Release
The way a granite component is supported during measurement is vital. Large, heavy granite structures are designed to maintain their geometry when supported at specific, mathematically calculated points (often based on Airy or Bessel points for optimal flatness).
- Correct Mounting: Verification must occur with the granite component resting on the supports designated by the engineering blueprint. Incorrect support points can induce internal stress and structural deflection, warping the surface and yielding an inaccurate “out-of-tolerance” reading, even if the component is perfectly manufactured.
- Vibration Isolation: The measuring environment must itself be isolated. ZHHIMG’s foundation, featuring a one-meter-thick anti-vibration concrete floor and a 2000 mm-deep isolation trench, minimizes external seismic and mechanical interference, ensuring the measurement is taken on a truly static body.
4. Selection: Choosing the Right Metrology Tool
Finally, the appropriate measuring instrument must be selected based on the required precision grade and the component’s geometry. No single tool is perfect for every task.
- Flatness: For overall high-precision flatness and geometric form, the Laser Interferometer or high-resolution Autocollimator (often paired with Electronic Levels) provides the necessary resolution and long-range accuracy.
- Local Accuracy: For checking localized wear or repeatability (Repeat Reading Accuracy), high-precision Electronic Levels or LVDT/Capacitance Probes with resolutions down to 0.1 μm are essential.
By meticulously adhering to these preparatory steps—managing thermal stability, maintaining cleanliness, and ensuring correct structural support—the ZHHIMG engineering team guarantees that the final measurements of our ultra-precision components are a true and reliable reflection of the world-class accuracy delivered by our materials and our master craftspeople.
Post time: Oct-24-2025

