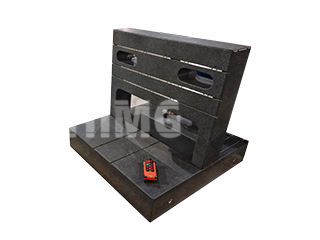
Granite components play a vital role in modern industrial production and laboratory metrology. As fundamental reference surfaces, they are used for precision measurement, alignment, machine assembly, and quality inspection. Their stability, corrosion resistance, and non-magnetic properties make high-quality granite an ideal material for instruments, machine bases, and precision tools. To ensure long-term accuracy, granite structures must be correctly installed and periodically restored when wear, abrasion, or accidental damage occurs. Understanding the repair process helps extend service life and maintain the reliability of critical equipment.
Proper installation is the foundation of a granite component’s accuracy. During setup, technicians typically use electronic or frame levels to align the working surface. The supporting bolts on the granite stand are adjusted to achieve horizontal stability, while the stand itself is normally welded from reinforced square tubing to minimize vibration during use. After the platform is carefully lifted and positioned on the stand, the leveling feet below the frame are fine-tuned to ensure that the entire assembly remains stable and free from movement. Any instability at this stage will directly affect measurement performance.
Over time, even high-grade granite can show minor wear or lose flatness due to heavy use, improper load distribution, or environmental effects. When this happens, professional restoration is essential to bring the component back to its original accuracy level. The repair process follows a sequence of controlled machining and hand-lapping steps. The first stage is coarse grinding, which removes surface deformation and re-establishes a uniform thickness and preliminary flatness. This step prepares the stone for more precise operations.
Once the surface has been corrected through coarse grinding, technicians begin semi-fine grinding to eliminate deeper scratches and refine the geometry. This stage is important for achieving a consistent and stable base before entering the final accuracy-critical phases. After semi-fine grinding, the granite is manually lapped using specialized tools and extremely fine abrasives. Skilled craftsmen—many with decades of experience—perform this operation by hand, gradually bringing the surface to its required precision. In high-accuracy applications, the process may be repeated multiple times to achieve micrometer or even sub-micrometer flatness.
When the required measurement accuracy has been reached, the granite surface is polished. Polishing improves surface smoothness, reduces roughness values, enhances wear resistance, and ensures long-term stability. At the end of the process, the component is carefully cleaned, inspected, and checked against international standards. A qualified granite surface must be free from defects such as pits, cracks, rust inclusions, scratches, or any imperfections that could affect performance. Every completed component undergoes metrological testing to confirm compliance with the desired grade.
In addition to restoration, granite materials themselves undergo strict laboratory testing before entering production. Test procedures typically include wear resistance evaluation, dimensional stability checks, mass and density measurement, and water absorption analysis. Samples are polished, cut to standard dimensions, and tested under controlled conditions. They are weighed before and after abrasive cycles, immersed in water to measure saturation, and dried in either constant-temperature or vacuum environments depending on whether the stone is natural granite or artificial stone. These tests verify that the material meets the durability and stability requirements expected in precision engineering.
Granite components, whether used in metrology labs or in advanced industrial machines, remain indispensable in fields requiring stable reference surfaces. With proper installation, regular inspection, and professional restoration, granite platforms and structures can maintain their accuracy for many years. Their inherent advantages—dimensional stability, corrosion resistance, and long-term reliability—make them essential tools in precision manufacturing, scientific research, and automated production environments.
Post time: Nov-20-2025

