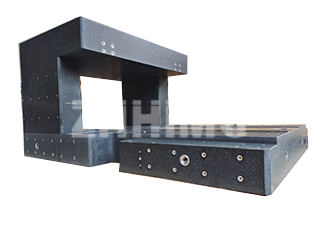
In high-precision manufacturing and metrology, the granite slab is the undisputed foundation—the zero-point reference for dimensional measurement. Its ability to hold a near-perfect plane is not merely a natural trait, but the result of a meticulously controlled shaping process, followed by disciplined, routine maintenance. But what is the definitive journey a granite slab takes to achieve such perfection, and what protocols are necessary to sustain it? For engineers and quality managers, understanding both the genesis of this precision and the necessary steps to preserve it is paramount to maintaining manufacturing quality.
Part 1: The Shaping Process—Engineering Flatness
The journey of a granite slab, from a rough-cut block to a reference-grade surface plate, involves a series of grinding, stabilization, and finishing stages, each designed to incrementally reduce dimensional error.
Initially, after cutting, the slab is subjected to Rough Shaping and Grinding. This stage removes large amounts of material to establish the approximate final geometry and rough flatness. Crucially, this process also serves to release much of the inherent residual stress that builds up in the stone during quarrying and initial cutting. By allowing the slab to “settle” and re-stabilize after each major material removal step, we prevent future dimensional drift, ensuring long-term stability.
The true transformation occurs during The Art of Precision Lapping. Lapping is the final, highly specialized process that refines a semi-flat surface into a certified reference plane. This is not mechanical grinding; it is a meticulous, low-speed, high-pressure operation. We use fine, loose abrasive compounds—often diamond slurry—suspended in a liquid medium, applied between the granite surface and a rigid cast iron lapping plate. The motion is carefully controlled to ensure uniform material removal across the surface. This averaging effect, repeated manually and mechanically in iterative steps, gradually refines the flatness to within microns or even sub-microns (meeting stringent standards like ASME B89.3.7 or ISO 8512). The precision achieved here is less about the machine and more about the operator’s skill, which we view as a vital, irreplaceable craft.
Part 2: Maintenance—The Key to Sustained Accuracy
A granite surface plate is a precision instrument, not a workbench. Once certified, its ability to maintain accuracy depends entirely on user protocols and the environment.
Environmental Control is the single greatest factor affecting granite accuracy. While granite has a low coefficient of thermal expansion (COE), a temperature difference between the top and bottom surfaces (a vertical temperature gradient) can cause the entire slab to subtly dome or warp. Therefore, the plate must be kept away from direct sunlight, air conditioning drafts, and excessive heat sources. An ideal environment maintains a stable 68°F ± 1°F (20℃ ± 0.5℃).
Regarding Usage and Cleaning Protocol, continuous localized use causes uneven wear. To combat this, we advise periodically rotating the slab on its stand and distributing measurement activity across the entire surface. Routine cleaning is mandatory. Dust and fine debris act as abrasives, accelerating wear. Only specialized granite cleaners, or high-purity isopropyl alcohol, should be used. Never use household detergents or water-based cleaners that can leave sticky residues or, in the case of water, temporarily chill and distort the surface. When the plate is idle, it must be covered with a clean, soft, non-abrasive cover.
Finally, concerning Recalibration and Renewal, even with perfect care, wear is inevitable. Depending on the usage grade (e.g., Grade AA, A, or B) and workload, a granite surface plate must be formally recalibrated every 6 to 36 months. A certified technician uses instruments like autocollimators or laser interferometers to map the surface deviation. If the plate falls outside its tolerance grade, ZHHIMG offers expert re-lapping services. This process involves bringing the precision lap back on-site or to our facility to meticulously restore the original certified flatness, effectively resetting the tool’s lifespan.
By understanding the high-stakes shaping process and committing to a rigorous maintenance schedule, users can ensure their granite surface plates remain a reliable foundation for all their precision quality demands, decade after decade.
Post time: Oct-24-2025

