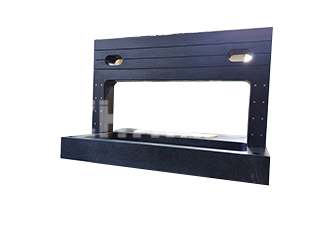
In precision laboratories, marble inspection platforms—also known as marble surface plates—play a vital role as reference bases for measurement, calibration, and inspection tasks. The accuracy of these platforms directly affects the reliability of the test results, which is why surface accuracy testing is a critical part of quality control.
According to the metrological verification standard JJG117-2013, marble inspection platforms are classified into four accuracy grades: Grade 0, Grade 1, Grade 2, and Grade 3. These grades define the allowable deviation in flatness and surface accuracy. However, maintaining these standards over time requires regular inspection and calibration, especially in environments where temperature fluctuations, vibration, and heavy use can influence the surface condition.
Testing the Surface Accuracy
When evaluating the surface accuracy of a marble inspection platform, a comparison sample is used as a benchmark. This comparison sample, often made from the same material, provides a visual and measurable reference. During the test, the treated surface of the platform is compared with the color and texture of the reference sample. If the treated surface of the platform does not display a pattern or color deviation beyond that of the standard comparison sample, it indicates that the platform’s surface accuracy remains within the acceptable range.
For a comprehensive assessment, three different locations on the platform are typically selected for testing. Each point is measured three times, and the average value of these measurements determines the final result. This method ensures statistical reliability and minimizes random errors during the inspection.
Consistency of Test Specimens
To ensure valid and repeatable results, the test specimens used in surface accuracy evaluation must be processed under the same conditions as the platform being tested. This includes using identical raw materials, applying the same production and finishing techniques, and maintaining similar color and texture characteristics. Such consistency ensures that the comparison between the specimen and the platform remains accurate and meaningful.
Maintaining Long-Term Accuracy
Even with precise manufacturing, environmental conditions and frequent use can gradually affect a marble inspection platform’s surface. To maintain accuracy, laboratories should:
-
Keep the platform clean and free from dust, oil, and coolant residue.
-
Avoid placing heavy or sharp objects directly on the measuring surface.
-
Periodically verify the flatness and surface accuracy using certified instruments or reference samples.
-
Store the platform in a stable environment with controlled humidity and temperature.
Conclusion
The surface accuracy of a marble inspection platform is fundamental to maintaining precision in laboratory measurement and inspection. By following standard calibration methods, using proper comparison samples, and adhering to consistent maintenance practices, laboratories can ensure the long-term stability and reliability of their marble surface plates. At ZHHIMG, we manufacture and calibrate marble and granite inspection platforms according to international standards, helping our clients maintain uncompromising measurement precision in every application.
Post time: Nov-11-2025

