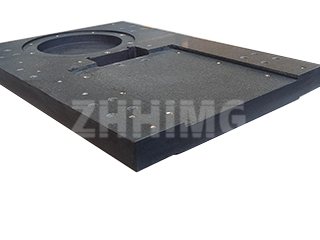
The demands of modern metrology and large-scale manufacturing often necessitate a granite platform far larger than any single block a quarry can provide. This leads to one of the most sophisticated challenges in ultra-precision engineering: creating a spliced or jointed granite platform that performs with the monolithic stability and micron-level accuracy of a single piece.
At ZHONGHUI Group (ZHHIMG®), solving this challenge is not merely about fastening pieces together; it’s about making the joint metrologically invisible.
Beyond the Limits of a Single Block
When designing a foundation for large Coordinate Measuring Machines (CMMs), aerospace inspection tools, or custom high-speed gantry systems, size constraints require us to combine multiple granite sections. To guarantee the platform’s integrity, our focus shifts to two critical areas: Meticulous Surface Preparation and the Integrated Calibration of the entire assembly.
The process begins with preparing the granite edges that will meet at the splice. These surfaces are not just ground flat; they are hand-lapped to achieve exceptional straightness and a flawless contact surface. This demanding preparation ensures a near-perfect, gap-free physical interface between sections, with any dimensional deviation measured in fractions of a micron—a tolerance far tighter than the platform’s overall required flatness.
Structural Epoxy: The Invisible Bond of Precision
The choice of connection method is pivotal. Traditional mechanical fasteners, such as bolts, introduce localized stress, which fundamentally compromises the granite’s natural stability and its vibration-dampening properties.
For a permanent, high-precision assembly, the industry standard and our preferred method is high-performance Structural Epoxy Bonding. This specialized resin acts as a thin, intensely rigid adhesive layer that offers immense structural integrity. Crucially, the epoxy distributes stress uniformly across the entire length and depth of the joint interface. This seamless bond helps the large platform perform as a single, continuous, homogeneous mass, preventing the localized distortions that could skew measurement data. The result is a permanent, non-shifting set that locks in the precision alignment achieved during assembly.
Final Vetting: Guaranteeing Accuracy Across the Vast Surface
The true accuracy of the joint is ultimately certified during the final, on-site calibration. Once the pieces are securely bonded and the assembly is set upon its custom-engineered, highly rigid support stand, the entire surface is treated as one.
Our expert engineers use advanced optical tools, including electronic levels and laser interferometers, to perform the final lapping and adjustment. They calibrate the entire platform, making micro-adjustments and selectively lapping across the joint line until the required overall flatness and Repeat Reading specifications (often to the strict standards of ASME B89.3.7 or DIN 876) are achieved. The surface continuity across the splice is definitively verified by moving sensitive measurement instruments directly over the joint, confirming that there is no detectable step or discontinuity.
For advanced manufacturing systems, a seamless, jointed granite platform is not a compromise—it is a proven, reliable engineering necessity. We invite you to contact us to discuss how we can custom-design and assemble a foundation that meets your large-scale metrology requirements with unparalleled precision.
Post time: Oct-17-2025

