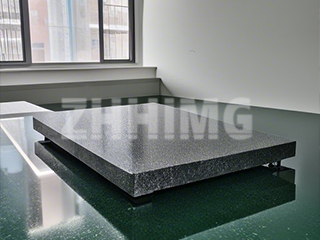
Granite straightedges are precision tools widely used in industries such as machine manufacturing, metrology, and mechanical assembly. Ensuring the accuracy of a granite straightedge is essential for guaranteeing measurement reliability and product quality. Below are the standard methods for checking the straightness and related geometric tolerances of granite straightedges.
1. Perpendicularity of the Side Against the Working Surface
To check the perpendicularity of the straightedge sides:
-
Place the granite straightedge on a calibrated surface plate.
-
Position a dial gauge with 0.001mm graduation through a standard round bar and zero it using a reference square.
-
Bring the dial gauge into contact with one side of the straightedge to record the perpendicularity deviation.
-
Repeat on the opposite side and record the maximum error as the perpendicularity value.
This ensures the side faces are square to the working surface, preventing measurement deviations during practical applications.
2. Contact Point Area Ratio of a Parallel Straightedge
To evaluate surface flatness by contact ratio:
-
Apply a thin layer of display agent to the working surface of the straightedge.
-
Rub the surface gently against a cast iron flat plate or another straightedge of equal or higher accuracy.
-
This process will reveal visible contact points.
-
Place a transparent plexiglass grid (200 small squares, each 2.5mm × 2.5mm) at random positions on the surface.
-
Count the proportion of squares containing contact points (in units of 1/10).
-
The average ratio is then calculated, representing the effective contact area of the working surface.
This method provides a visual and quantitative evaluation of the straightedge’s surface condition.
3. Straightness of the Working Surface
To measure straightness:
-
Support the straightedge at standard marks located at 2L/9 from each end using equal-height blocks.
-
Select a proper testing bridge according to the length of the working surface (generally 8–10 steps, spanning 50–500mm).
-
Secure an autocollimator, electronic level, or precision spirit level to the bridge.
-
Move the bridge step by step from one end to the other, recording readings at each position.
-
The difference between the maximum and minimum values indicates the straightness error of the working surface.
For localized measurements over 200mm, a shorter bridge plate (50mm or 100mm) can be used to determine straightness error with higher resolution.
4. Parallelism of Working and Support Surfaces
Parallelism must be verified between:
-
The upper and lower working surfaces of the straightedge.
-
The working surface and the support surface.
If a reference flat plate is unavailable:
-
Place the side of the straightedge on a stable support.
-
Use a lever-type micrometer or precision micrometer with 0.002mm graduation to measure height differences along the length.
-
The deviation represents the parallelism error.
Conclusion
Checking the straightness and geometric accuracy of granite straightedges is essential for maintaining measurement integrity in precision industries. By verifying perpendicularity, contact point ratio, straightness, and parallelism, users can ensure their granite straightedges meet the highest accuracy standards required for industrial and laboratory applications.
Post time: Sep-17-2025

