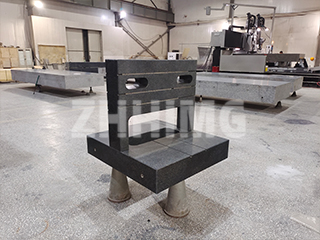
For manufacturers, engineers, and quality inspectors seeking precise flatness measurements of granite platforms and cast iron platforms, obtaining accurate original data is the core of ensuring product performance. This guide details 3 practical methods for granite platform flatness data collection and a specialized diagonal method for cast iron platforms, helping you choose the right approach based on on-site conditions and improve measurement efficiency—ultimately supporting your production quality control and customer trust-building.
Part 1: 3 Methods to Get Original Flatness Data of Granite Platforms
Granite platforms are widely used in precision machining, metrology, and tool calibration due to their high stability and wear resistance. Their flatness directly affects measurement accuracy, so selecting a suitable data collection method is critical. Below are 3 commonly used, industry-proven methods, each with clear advantages and application scenarios to fit your on-site needs.
1. Graphical Method (Ideal for On-Site Quick Checks)
The Graphical Method is a geometric drawing-based solution that transforms flatness measurement into visual coordinate analysis. Here’s how it works:
- First, record the measured values of each test point on the granite platform.
- Then, plot these values on a right-angle coordinate system in proportion (e.g., 1mm = 1cm on graph paper).
- Finally, measure the flatness deviation directly from the coordinate graph by identifying the maximum and minimum value points.
Key Advantages:
- Simple operation with no complex tools—only graph paper, a ruler, and a pencil are needed.
- Highly intuitive: The distribution of flatness deviations is clearly visible, making it easy to explain results to on-site teams or customers.
Considerations:
- Requires precise drawing to avoid errors from uneven scaling or misplotted points.
- Best for on-site quick verifications (e.g., pre-shipment inspections or routine maintenance) rather than ultra-high-precision measurements.
2. Rotation Method (Basic & Reliable for All Operators)
The Rotation Method simplifies data processing by adjusting the measurement reference (rotating or translating the base) to align with the evaluation reference—ensuring the result meets the “minimum condition” (the smallest possible flatness deviation).
Operational Steps:
- Place the measuring instrument (e.g., a level or autocollimator) on the granite platform.
- Rotate the platform’s base slightly multiple times until the measurement reference overlaps with the ideal flatness plane.
- Convert the collected data after each rotation to obtain the final flatness error.
Key Advantages:
- No need for drawing or complex calculations—ideal for operators who prefer hands-on adjustments.
- High reliability: As a fundamental industry method, it guarantees accurate results as long as rotation essentials are mastered.
Considerations:
- New operators may need practice to minimize the number of rotations (unfamiliarity can reduce efficiency).
- Works well in workshops with limited space (no large calculation tools required).
3. Calculation Method (Precise for High-Stakes Measurements)
The Calculation Method uses mathematical formulas to compute flatness errors, eliminating human error from drawing or rotation. It is the first choice for scenarios requiring ultra-precision (e.g., aerospace part inspection or high-end tool calibration).
Implementation Process:
- Collect all test point data using a precision measuring tool (e.g., a laser interferometer).
- Input the data into a pre-derived formula (e.g., least squares method or three-point method).
- Calculate the flatness deviation by comparing the maximum and minimum values relative to the ideal plane.
Key Advantages:
- Highest precision: Avoids graphical or operational errors, ensuring results meet ISO or ANSI standards.
- Time-saving for batch measurements: Once the formula is set up, data can be processed quickly with Excel or specialized software.
Critical Note:
- Accurately identifying the “highest point” and “lowest point” of the platform is essential—misjudgment here will lead to incorrect calculations.
- Recommended for teams with basic mathematical knowledge or access to measurement software.
Part 2: Diagonal Method – Specialized for Cast Iron Platform Flatness Data
Cast iron platforms (common in heavy machinery and forging industries) require a targeted approach due to their larger size and higher load-bearing capacity. The Diagonal Method is a industry-standard technique for cast iron platforms, using the diagonal plane as the ideal reference to calculate flatness.
How the Diagonal Method Works
- Data Collection: Use a level or autocollimator to measure the straightness deviation of each cross-section on the cast iron platform. Focus on deviations relative to the line connecting the two ends of each cross-section.
- Data Conversion: Convert these straightness deviations to the “diagonal plane” (the ideal plane formed by the platform’s two diagonals).
- Error Calculation:
- For diagonal principle evaluation: The flatness error is the algebraic difference between the maximum and minimum deviations from the diagonal plane.
- For minimum condition evaluation: The converted deviations relative to the ideal diagonal plane serve as the original flatness data (this data is often used for further precision adjustments).
Why Choose the Diagonal Method for Cast Iron Platforms?
- Cast iron platforms tend to have uneven stress distribution (e.g., from cooling during casting). The diagonal plane accounts for this unevenness better than a standard horizontal reference.
- It is compatible with most on-site instruments (no need for expensive specialized tools), reducing your equipment investment.
How to Choose the Right Method for Your Business?
All 3 granite platform methods and the cast iron diagonal method are industry-recognized—your choice depends on:
- On-site conditions: Use the Graphical Method if you need quick checks; choose the Rotation Method for limited space.
- Precision requirements: Opt for the Calculation Method for high-precision projects (e.g., medical device manufacturing).
- Team expertise: Select the method that aligns with your team’s skills (e.g., Rotation Method for hands-on operators, Calculation Method for tech-savvy teams).
Let ZHHIMG Support Your Precision Measurement Needs
At ZHHIMG, we specialize in high-quality granite and cast iron platforms—plus, we offer free technical consulting to help you optimize flatness measurement processes. Whether you need to confirm the right method for your project or want to source precision platforms that meet your flatness standards, our team is ready to assist.
Post time: Aug-26-2025

