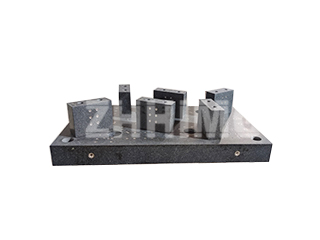
In the world of ultra-precision manufacturing and metrology, the granite surface plate stands as the unchallenged foundation of dimensional accuracy. Tools like granite squares, parallels, and V-blocks are essential references, yet their full potential—and guaranteed accuracy—is unlocked only through proper handling and application. Understanding the basic principles of using these vital instruments ensures the longevity of their certified flatness and safeguards the integrity of every measurement taken.
The Thermal Equilibrium Principle
Unlike metal tools, granite possesses an extremely low coefficient of thermal expansion, a key reason why it is chosen for high-accuracy work. However, this stability does not negate the need for thermal equilibrium. When a granite tool is first moved into a controlled environment, such as a calibration lab or a cleanroom using ZHHIMG’s components, it must be allowed sufficient time to normalize to the ambient temperature. Introducing a cold granite component to a warm environment, or vice versa, will cause temporary, minute distortions. As a rule of thumb, always allow large granite pieces several hours to fully stabilize. Never rush this step; your measurement accuracy depends on a patient wait for thermal harmony.
The Gentle Application of Force
A common pitfall is the improper application of downward force on the granite surface. When placing measuring equipment, components, or fixtures onto a granite surface plate, the goal is always to achieve contact without imparting unnecessary load that could induce localized deflection. Even with the high rigidity of our ZHHIMG Black Granite (density ≈ 3100 kg/m³), excessive load concentrated in one area can temporarily compromise the certified flatness—especially in thinner tools like straightedges or parallels.
Always ensure the weight is distributed evenly across the reference surface. For heavy components, confirm your surface plate’s support system is correctly aligned with the designated support points on the plate’s underside, a measure ZHHIMG strictly adheres to for large assemblies. Remember, in precision work, a light touch is the standard of practice.
Preservation of the Working Surface
The surface of a precision granite tool is its most valuable asset, achieved through decades of experience and hand-lapping mastery by technicians trained to various global standards (like DIN,ASME, and JIS). Protecting this finish is paramount.
When using granite, always move components and gauges gently across the surface; never slide a sharp or abrasive object. Before positioning a workpiece, clean both the workpiece base and the granite surface to remove any micro-grit that could cause abrasive wear. For cleaning, only use non-abrasive, pH-neutral granite cleaners, avoiding any harsh acids or chemicals that could degrade the finish.
Finally, the long-term storage of granite measuring tools is vital. Always store granite rulers and squares on their designated sides or in protective cases, preventing them from being knocked or damaged. For surface plates, avoid leaving metal parts resting on the surface overnight, as metal can attract condensation and risk rust stains—a crucial factor in humid factory environments.
By adhering to these fundamental usage principles—ensuring thermal stability, applying minimal force, and meticulous surface maintenance—the engineer ensures that their ZHHIMG® precision granite tools will retain their certified micro-accuracy, fulfilling our company’s ultimate promise: stability that defines accuracy for decades.
Post time: Oct-29-2025

