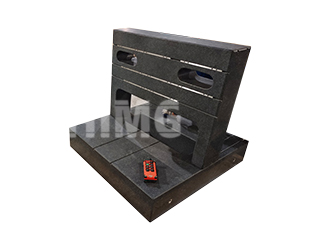
The granite surface plate is a long-term capital investment, the very definition of a durable asset in the world of metrology. Yet, this essential tool is not immune to wear, damage, or the inevitable loss of flatness over time. For any quality control manager, understanding not only the proper selection of a granite inspection surface plate but also the processes for granite surface plate repair is paramount to minimizing downtime and preserving accuracy. The expectation that a surface plate, regardless of whether it’s an insize granite surface plate or another leading brand, will maintain its certified flatness indefinitely is simply unrealistic.
The Anatomy of Wear: Why Granite Surface Plate Repair Becomes Necessary
The primary reason a granite plate requires maintenance is localized wear. Even the hardest black granite succumbs to the constant friction from measuring instruments, workpieces, and abrasive dust particles. This wear typically manifests in high wear spots, which occur where instruments like height gauges are frequently set and moved, creating subtle dips that compromise the local repeatability readings. This is often the first sign that professional granite surface plate repair might be needed. Additionally, accidental impact on the plate’s edges or corners can cause chipping; while chips away from the working area may not directly affect flatness, they can compromise the structural integrity and indicate rough handling. Furthermore, over years of heavy use, the entire plate may gradually fall out of its certified grade (e.g., a Grade 0 plate might degrade to Grade 1 tolerance). This necessitates complete resurfacing. When the required tolerance for the inspection work is no longer met, the solution isn’t replacement, but a specialized repair process called re-lapping or resurfacing. This involves highly skilled technicians meticulously wearing down the high spots on the plate using abrasive compounds and large master reference plates, bringing the flatness back within the certified tolerance. This specialized service extends the lifespan of the plate indefinitely, making it a critical aspect of metrology equipment management.
The Gold Standard: What Is Standard for Granite Surface Plate?
To effectively manage a metrology laboratory, one must first define what is standard for granite surface plate accuracy. This standard refers to the globally recognized tolerance grades (AA, 0, and 1) established by specifications like the U.S. Federal Specification GGG-P-463c or the German DIN 876. These documents dictate the maximum permissible deviation from a perfect plane, ensuring universal interchangeability of parts and measurements worldwide. The true standard, however, also encompasses a philosophy of reliable sourcing. Manufacturers like insize granite surface plate or other established brands adhere to strict quality control protocols, not just in achieving the initial flatness but in certifying the quality of the raw black granite—ensuring it has a low quartz content, high density, and a low coefficient of thermal expansion (CTE) to resist dimensional change due to temperature fluctuations. A granite inspection surface plate purchased from a reputable supplier carries the guarantee that the material itself is appropriate for high-precision work.
Equipping for Inspection: The Role of the Granite Surface Plate with Indicator Post
A core task performed on a granite inspection surface plate is comparative gauging, where a known standard (gage block) is used to set a gauge, and the workpiece is then measured against that set dimension. This process often utilizes a granite surface plate with indicator post. The indicator post, typically a sturdy column mounted to a magnetic or mechanical base, holds a dial test indicator or digital probe. Its stability is essential for accurate measurement. While simple column gauges can be moved around the plate, having a plate specifically engineered to integrate these fixtures streamlines the inspection process. A granite surface plate with indicator post often implies a permanent, highly stable setup, sometimes utilizing threaded inserts within the plate surface to bolt the post directly, eliminating the slight movement or tilt possible with magnetic bases. Furthermore, the granite provides an ideal datum for setting the indicator zero point using a gage block, and the indicator post maintains the height and perpendicularity, ensuring highly repeatable comparative measurements, which is the cornerstone of inspection metrology. This integration of a stable post with a certified granite inspection surface plate maximizes the potential accuracy of the entire measuring system, transforming the simple slab into a complete, high-precision gauging station.
Maintaining the Integrity of the Granite Inspection Surface Plate
Preventive care is always cheaper than granite surface plate repair. While wear is inevitable, its rate can be drastically reduced through disciplined housekeeping. The greatest enemy of the plate is dust and grit, which acts as an abrasive slurry under instruments. Users should rigorously clean the plate before and after every use with specialized surface plate cleaner, and never drag heavy objects across the surface. Ultimately, the commitment to metrology quality means accepting the necessary life cycle of these instruments: diligent selection, use, scheduled calibration, and necessary granite surface plate repair. By adhering to the fact that strict adherence to dimensional standards is standard for granite surface plate, quality control professionals safeguard the accuracy of every single measurement that contributes to the final integrity of the product.
Post time: Nov-26-2025

