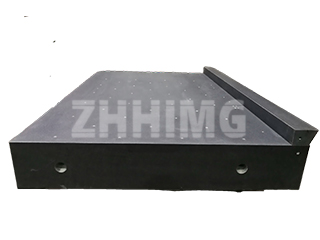
Precision granite square rulers are indispensable tools in mechanical engineering and metrology, revered for their exceptional accuracy, high stability, and inherent wear resistance. To ensure the reliability of measurement results and maximize the service life of these critical instruments, stringent protocols must be followed before, during, and after their use.
I. Pre-Use Preparation: Setting the Stage for Accuracy
A. Visual Inspection and Integrity Check
Before any measurement task, a detailed visual inspection of the granite square ruler is mandatory. Operators must meticulously check the working and measuring faces for any signs of damage, such as chips, deep scratches, or impact marks. Any visible defect can compromise the ruler’s geometric accuracy and stability. If significant blemishes are found, the ruler must be withdrawn from service immediately for professional inspection or replacement.
B. Meticulous Cleaning Procedure
The work surfaces must be perfectly clean. Use a clean, soft cotton cloth or a specialized cleaning tool to gently wipe away dust, oil residue, and other contaminants. For stubborn stains, a small amount of neutral cleaning agent may be used. It is absolutely crucial to avoid acidic, alkaline, or strong oxidizing cleaning agents, as these can chemically degrade the granite surface over time.
C. Pre-Use Calibration Verification
While precision granite is renowned for its exceptional dimensional stability, minor deformations can occur after prolonged storage or transportation. Therefore, it is best practice to perform a pre-use calibration check using even higher-precision instruments, such as an autocollimator or electronic level system, to confirm the ruler’s angular accuracy meets the required standards for the specific application.
II. Operational Standards: Ensuring Measurement Fidelity
A. Stable Placement and Support
The granite square ruler must be placed on a firm, stable measurement surface, avoiding any location prone to vibration, inclination, or unevenness. When setting the ruler down, ensure both working faces are in full and stable contact with the reference surface, maintaining a horizontal state. This simple measure minimizes measurement errors induced by unstable placement.
B. Careful Handling Protocol
The non-metallic nature of granite makes it prone to cracking if subjected to sudden impact. Operators must always handle the ruler with extreme care, avoiding forceful movements or collisions with hard objects. When moving the instrument, use both hands to grip the edges or designated handles, lifting and setting it down smoothly to prevent damage from dropping or bumping.
C. Precision Measurement Technique
During measurement, the workpiece must be brought into tight, intimate contact with the ruler’s working face, eliminating any perceptible gap. For small workpieces, appropriate clamps or auxiliary tools should be used to securely fix the position. Furthermore, attention must be paid to the measurement force; excessive force can lead to temporary deformation of the granite ruler or damage to the workpiece surface.
D. Non-Cross-Contamination of Grade
Granite square rulers of different accuracy grades must be used separately. High-precision rulers (e.g., DIN 875/000 grade) should be reserved strictly for critical precision measurements, while lower-grade rulers are suitable for general checks. This segregation prevents the inadvertent degradation of critical measurement standards.
III. Post-Use Maintenance: Preservation for Longevity
A. Immediate and Thorough Cleaning
After use, the ruler must be cleaned immediately. Wipe the surface again with a clean cotton cloth to remove any residual grime or moisture left from the measurement process. If the ruler was used in special environments involving cutting fluids or oils, a dedicated cleaning solution should be used for a comprehensive cleanup.
B. Rust Prevention for Metal Fittings
Although granite itself is impervious to rust, any associated metal fittings (such as handles or adjustment screws) are not. Should these fittings come into contact with moisture or corrosive substances, rust can occur. Applying a thin layer of anti-rust oil to these metal components is essential to prevent corrosion damage.
C. Secure and Optimized Storage
The cleaned granite square ruler should be stored in a dry, ventilated environment free from corrosive gases. It is highly recommended to use a dedicated storage case or dust cover for protection, safeguarding the surface from dust, debris, and, most importantly, preventing collision and crushing damage.
IV. Scheduled Care and Certification
A. Routine Inspection and Remediation
Regularly inspect the ruler’s surface for signs of wear or deformation. For critical wear areas, prompt repair or resurfacing is necessary. While granite does not require lubrication, ensuring that any related mechanical elements are functional is part of a routine maintenance check.
B. Periodic Calibration for Traceability
Based on usage frequency and required precision level, the granite square ruler must be submitted to an accredited metrology institute for periodic calibration. High-precision rulers typically require shorter calibration cycles, whereas lower-grade instruments can have extended cycles. Only rulers that pass the calibration certification can continue to be used, guaranteeing the traceability and accuracy of all measurement results.
In summation, the correct handling and proactive maintenance of a precision granite square ruler are pivotal to ensuring measurement accuracy and extending its operational life. By strictly adhering to these operational guidelines, we ensure the full advantages of ZHHIMG’s superior granite metrology tools are realized, providing an unshakeable foundation for production and research globally.
Post time: Nov-14-2025

