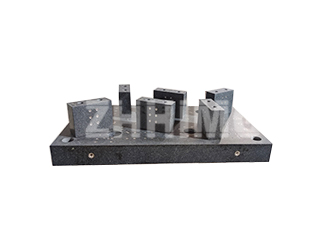
Precision granite components play a central role in dimensional inspection, serving as reference planes for verifying part geometry, checking form errors, and supporting high-accuracy layout work. Their stability, rigidity, and resistance to long-term deformation make granite a trusted material across metrology labs, machine tool builders, and ultra-precision manufacturing environments. While granite is widely known as a durable structural stone, its behavior as a metrological reference surface follows specific geometric principles—especially when the reference base is reconfigured during calibration or inspection.
Granite originates from slow-cooled magma deep within the Earth’s crust. Its uniform grain structure, strong interlocking minerals, and excellent compressive strength give it the long-term dimensional stability required for precision engineering. High-quality black granite in particular offers minimal internal stress, a fine crystalline structure, and exceptional resistance to wear and environmental influences. These characteristics explain why granite is used not only in machine bases and inspection tables but also in demanding outdoor applications where appearance and durability must remain consistent over decades.
When a granite reference surface undergoes a change of datum—such as during calibration, surface reconstruction, or when switching measurement bases—the behavior of the measured surface follows predictable rules. Because all height measurements are taken perpendicular to the reference plane, tilting or shifting the datum alters the numerical values proportionally to the distance from the axis of rotation. This effect is linear, and the magnitude of increase or decrease in measured height at each point corresponds directly to its distance from the pivot line.
Even when the datum plane is rotated slightly, the direction of measurement remains effectively perpendicular to the surface being evaluated. The angular deviation between the working datum and the inspection reference is extremely small, so any resulting influence is a secondary error and is typically negligible in practical metrology. Flatness evaluation, for example, is based on the difference between the highest and lowest points, so a uniform shift of the datum does not affect the final result. Numerical data can therefore be offset by the same amount across all points without altering the flatness outcome.
The change in measurement values during datum adjustment simply reflects the geometric translation or rotation of the reference plane. Understanding this behavior is essential for technicians who calibrate granite surfaces or analyze measurement data, ensuring that changes in numerical values are interpreted correctly and not mistaken for actual surface deviations.
Producing precision granite components also requires strict mechanical conditions. The auxiliary machinery used to process the stone must be kept clean and well maintained, as contamination or internal corrosion can compromise accuracy. Before machining, components of the equipment must be inspected for burrs or surface defects, and lubrication should be applied where needed to ensure smooth motion. Dimensional checks must be repeated throughout assembly to guarantee that the final component meets specification. Trial runs are necessary before any formal machining begins; improper machine setup can lead to chipping, excessive material loss, or misalignment.
Granite itself is composed primarily of feldspar, quartz, and mica, with quartz content often reaching up to half of the total mineral composition. Its high silica content contributes directly to its hardness and low wear rate. Because granite outperforms ceramics and many synthetic materials in long-term durability, it is widely used not only in metrology but also in flooring, architectural cladding, and outdoor structures. Its resistance to corrosion, lack of magnetic reaction, and minimal thermal expansion make it an excellent replacement for traditional cast-iron plates, especially in environments where temperature stability and consistent performance are required.
In precision measurement, granite offers another advantage: when the working surface is accidentally scratched or struck, it forms a small pit instead of a raised burr. This prevents local interference with the sliding motion of measuring instruments and maintains the integrity of the reference plane. The material does not warp, resists wear, and maintains geometric stability even after years of continuous operation.
These characteristics have made precision granite an indispensable material in modern inspection systems. Understanding the geometric principles behind datum change, combined with correct machining practices and maintenance of the equipment used to process granite, is essential for ensuring that every reference surface performs reliably throughout its service life.
Post time: Nov-21-2025

