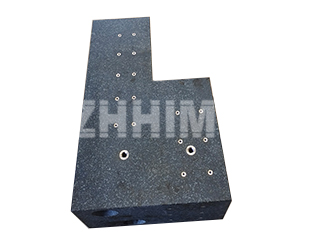
While a granite platform might seem like a simple slab of stone, the selection criteria drastically change when moving from ordinary industrial applications to high-stakes optical inspection and metrology. For ZHHIMG®, supplying precision components to world leaders in semiconductor and laser technology means recognizing that a platform for optical measurement is not just a base—it is an integral, non-negotiable part of the optical system itself.
The requirements for optical inspection—which include high-magnification imaging, laser scanning, and interferometry—are defined by the need to eliminate all sources of measurement noise. This leads to a focus on three special properties that distinguish a true optical platform from a standard industrial one.
1. Superior Density for Unmatched Vibration Damping
For standard industrial CNC bases, cast iron or typical granite might offer adequate stiffness. However, optical setups are exceptionally sensitive to minute displacements caused by external vibrations from factory equipment, air handling systems, or even distant traffic.
This is where material science becomes paramount. An optical platform requires granite with exceptional inherent material damping. ZHHIMG® utilizes its proprietary ZHHIMG® Black Granite (≈ 3100 kg/m³). This ultra-high-density material, unlike lower-grade granite or marble substitutes, possesses a crystalline structure highly efficient at dissipating mechanical energy. The goal is not just to reduce vibration, but to ensure the base remains an utterly quiet mechanical floor, minimizing relative motion between the objective lens and the inspected sample at the sub-micron level.
2. Extreme Thermal Stability to Combat Drift
Standard industrial platforms tolerate minor dimensional changes; a tenth of a degree Celsius might not matter for drilling. But in optical systems that perform precise measurements over extended periods, any thermal drift in the base’s geometry introduces systematic error.
For optical inspection, a platform must act as a thermal sink with an exceptionally low coefficient of thermal expansion (CTE). The superior mass and density of ZHHIMG® Black Granite provide the necessary thermal inertia to resist minute expansions and contractions that can occur within a climate-controlled room. This stability ensures that the calibrated focus distance and planar alignment of the optical components remain fixed, guaranteeing the integrity of measurements spanning hours—a non-negotiable factor for high-resolution wafer inspection or flat-panel display metrology.
3. Achieving Nano-Level Flatness and Geometric Precision
The most visible difference is the requirement for flatness. While an ordinary industrial base may meet Grade 1 or Grade 0 flatness (measured in a few microns), optical systems demand accuracy in the nanometer range. This level of geometric perfection is necessary to provide a reliable reference plane for linear stages and autofocus systems that operate on the principles of light interference.
Achieving and certifying nanometer-level flatness requires an entirely different manufacturing approach. It involves highly specialized techniques using advanced machinery like Taiwan Nanter grinders and is confirmed by sophisticated metrology equipment such as Renishaw Laser Interferometers. This process must take place in an ultra-stable environment, such as ZHHIMG®’s vibration-damped, climate-controlled workshops, where even the subtle movements of the air are minimized.
In essence, selecting a granite precision platform for optical inspection is a decision to invest in a component that actively guarantees the precision of the optical measurement itself. It requires partnering with a manufacturer who views ISO 9001 certification and comprehensive dimensional traceability not as optional features, but as foundational requirements for entering the world of ultra-precision optics.
Post time: Oct-21-2025

