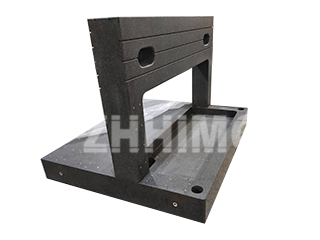
Choosing a granite precision platform for advanced applications is never a simple selection, but when the application involves optical inspection—such as for high-magnification microscopy, Automated Optical Inspection (AOI), or sophisticated laser measurement—the requirements leap far beyond those for ordinary industrial uses. Manufacturers like ZHHIMG® understand that the platform itself becomes an intrinsic part of the optical system, demanding properties that minimize noise and maximize measurement integrity.
The Thermal and Vibrational Demands of Photonics
For most industrial machine bases, the primary concerns are load capacity and basic flatness (often measured in microns). However, optical systems—which are fundamentally sensitive to minute positional shifts—require precision measured in the sub-micron or nanometer range. This mandates a superior grade of granite platform engineered to address two critical environmental enemies: thermal drift and vibration.
Optical inspection often involves lengthy scan times or exposures. During this period, any change in the platform’s dimensions due to temperature fluctuation—known as thermal drift—will directly introduce measurement error. This is where high-density black granite, like the proprietary ZHHIMG® Black Granite (≈ 3100kg/m³), becomes essential. Its high density and low coefficient of thermal expansion ensure that the base remains dimensionally stable even in environments with minor temperature swings. An ordinary granite base simply cannot offer this level of thermal inertia, making it unsuitable for imaging or interferometric setups.
The Imperative of Inherent Damping and Super Flatness
Vibration is the other major challenge. Optical systems rely on an extremely precise distance between the sensor (camera/detector) and the sample. External vibrations (from factory machinery, HVAC, or even distant traffic) can cause relative motion, blurring images or invalidating metrology data. While air isolation systems can filter out low-frequency noise, the platform itself must possess high inherent material damping. The crystalline structure of top-tier, high-density granite excels at dissipating residual, high-frequency vibrations far better than metallic bases or lower-grade stone composites, creating a truly quiet mechanical floor for the optics.
Furthermore, the requirement for flatness and parallelism is dramatically elevated. For standard tooling, Grade 0 or Grade 00 flatness might suffice. For optical inspection, where auto-focus and stitching algorithms are involved, the platform must often achieve flatness measurable in the nanometer scale. This level of geometric accuracy is only possible through specialized manufacturing processes utilizing precision lapping machines, followed by verification using advanced tools like Renishaw Laser Interferometers and certified by globally recognized standards (e.g., DIN 876, ASME, and verified by certified metrology experts).
Manufacturing Integrity: A Seal of Trust
Beyond the material science, the structural integrity of the base—including the precise location and alignment of mounting inserts, tapped holes, and integrated air-bearing pockets—must meet aerospace-level tolerances. For companies supplying global optical original equipment manufacturers (OEMs), third-party accreditation acts as a non-negotiable proof of process. Possessing comprehensive certifications like ISO 9001, ISO 14001, and CE—as ZHHIMG® does—assures the procurement manager and the design engineer that the entire manufacturing workflow, from quarry to final inspection, is globally compliant and repeatable. This ensures low risk and high reliability for equipment destined for high-value applications like flat-panel display inspection or semiconductor lithography.
In summary, selecting a granite precision platform for optical inspection is not just about choosing a piece of stone; it’s about investing in a foundational component that actively contributes to the stability, thermal control, and ultimate accuracy of the optical measurement system. This demanding environment requires a partner with superior material, proven capability, and certified global trust.
Post time: Oct-21-2025

