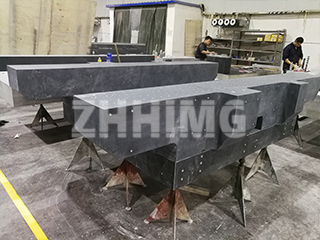
Renowned for their distinctive black hue, uniform dense structure, and exceptional properties—including rust-proofness, resistance to acids and alkalis, unparalleled stability, high hardness, and wear resistance—granite surface plates are indispensable as precision reference bases in mechanical applications and laboratory metrology. Ensuring these plates meet exact dimensional and geometric standards is critical for performance. Below are the standard methods for inspecting their specifications.
1. Thickness Inspection
- Tool: A vernier caliper with a readability of 0.1 mm.
- Method: Measure the thickness at the midpoint of all four sides.
- Assessment: Calculate the difference between the maximum and minimum values measured on the same plate. This is the thickness variation (or extreme difference).
- Standard Example: For a plate with a specified nominal thickness of 20 mm, the allowable variation is typically within ±1 mm.
2. Length and Width Inspection
- Tool: A steel tape or ruler with a readability of 1 mm.
- Method: Measure the length and width along three different lines each. Use the average value as the final result.
- Purpose: Accurately record the dimensions for quantity calculation and to verify conformity to ordered sizes.
3. Flatness Inspection
- Tool: A precision straightedge (e.g., a steel straightedge) and feeler gauges.
- Method: Place the straightedge across the surface of the plate, including along both diagonals. Use the feeler gauge to measure the gap between the straightedge and the plate surface.
- Standard Example: The maximum permissible flatness deviation might be specified as 0.80 mm for certain grades.
4. Squareness (90° Angle) Inspection
- Tool: A high-accuracy 90° steel angle ruler (e.g., 450×400 mm) and feeler gauges.
- Method: Firmly place the angle ruler against a corner of the plate. Measure any gap between the plate’s edge and the ruler using the feeler gauge. Repeat this process for all four corners.
- Assessment: The largest gap measured determines the squareness error.
- Standard Example: The allowable limit tolerance for angular deviation is often specified, for instance, as 0.40 mm.
By adhering to these precise and standardized inspection protocols, manufacturers guarantee that every granite surface plate delivers the geometric accuracy and reliable performance required for critical measurement tasks in industries worldwide.
Post time: Aug-20-2025

