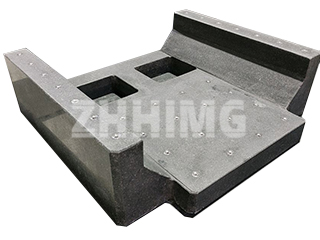
Granite surface plates are the cornerstone of precision measurement, widely used in laboratories and manufacturing facilities as reference bases for inspecting instruments, precision tools, and mechanical components. Made from high-quality natural granite, these plates combine the physical advantages of stone with exceptional dimensional stability, offering superior performance to traditional cast iron plates.
Each granite surface plate is produced through a combination of precision machining and meticulous hand-grinding, typically in a constant temperature environment to ensure maximum accuracy. The result is a smooth, flat working surface with a fine-grained structure, black luster, and uniform texture. This combination of aesthetics and precision makes granite an irreplaceable material for high-precision measurement and calibration work.
To achieve and maintain such precision, granite surface plates must meet strict material and manufacturing standards. The stone used should be fine-grained and dense—commonly gabbro, diabase, or black granite—with biotite content below 5%, water absorption under 0.25%, and an elastic modulus exceeding 0.6 × 10⁻⁴ kg/cm². The surface hardness must be higher than 70 HS to ensure excellent wear resistance. During production, the working surface must be completely free from cracks, dents, air holes, or slag inclusions. Minor cosmetic flaws that do not affect accuracy may be acceptable, but any defect on the measuring surface that could influence results is strictly prohibited.
Unlike cast iron plates, granite surface plates are non-magnetic, corrosion-resistant, and unaffected by temperature variations or humidity. They maintain flatness over long-term use and are not prone to rust or deformation. Even under impact, granite may only chip slightly without affecting the integrity or accuracy of the surface. This durability gives granite a decisive advantage in environments requiring stable, high-precision measurements.
For top-grade surface plates, such as Grade 000 and Grade 00, handling features like lifting handles are generally not recommended to avoid influencing the accuracy of the working surface. If threaded inserts or grooves are needed on Grade 0 or Grade 1 plates, their depth must remain below the surface plane to prevent distortion. The permissible surface roughness (Ra) of the working surface is typically between 0.32 and 0.63 μm, while the sides may reach up to 10 μm. Additionally, the perpendicularity tolerance of adjacent sides conforms to the GB/T1184 Grade 12 standard, ensuring precise geometric relationships across all measuring surfaces.
Proper usage and maintenance are essential for preserving the precision of granite surface plates. They should be used in a clean, temperature-controlled environment, protected from impact, and cleaned regularly to remove dust and debris. When handled correctly, granite surface plates offer unmatched dimensional stability and longevity, serving as a reliable foundation for high-precision measurement and inspection in modern industry.
At ZHHIMG, we specialize in the production and calibration of precision granite surface plates that meet international standards. Our advanced manufacturing processes, strict quality control, and ISO-certified production ensure that every granite plate delivers enduring accuracy and performance trusted by engineers and laboratories worldwide.
Post time: Nov-11-2025

