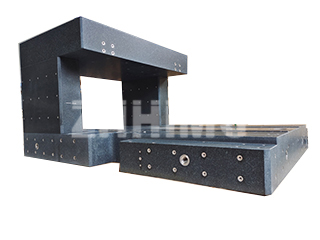
In the world of precision measurement, granite measuring tools, such as surface plates, are an indispensable benchmark. Many users, however, may not be aware of the crucial factors that contribute to their accuracy and long-term stability. At ZHHIMG®, we understand that a tool’s thickness is a primary factor in its ability to serve as a reliable measurement standard.
Thickness: The Foundation of Precision Stability
The thickness of a granite measuring tool is not just a matter of bulk; it is fundamental to its precision stability. While some customers may request a reduced thickness to lower weight, we strongly advise against this. A thinner platform may meet initial accuracy standards, but its stability and long-term performance will be compromised. Over time, it is likely to lose its original precision, rendering it useless for critical applications.
The industry has established standard thickness-to-size ratios for a reason. These standards ensure the granite platform can resist deformation from its own weight and from the load of the components being measured. At ZHHIMG®, we design our platforms so that thickness is directly proportional to the size, guaranteeing optimal stability without unnecessary mass. Our superior ZHHIMG® Black Granite further enhances this stability with its dense, uniform structure.
Precision Grades and Manufacturing Control
Granite measuring platforms are categorized by different grades of accuracy. Our Grade 00 platforms, for example, require a strictly controlled environment of 20±2°C and 35% humidity, which is why we produce and store them in our advanced constant temperature and humidity workshops. Lower grades, like Grade 1 and Grade 2, are suitable for use at room temperature.
Before any inspection, the granite platform must be meticulously leveled with an electronic level. For small platforms, we use a diagonal test method to verify flatness, while larger platforms are inspected using a square grid method to ensure every point on the surface meets our stringent standards. To guarantee uncompromised accuracy, all measuring tools and the granite platform must acclimatize for at least eight hours in the controlled environment before testing.
Our Meticulous 5-Step Lapping Process
The thickness of a granite tool is only as good as the craftsmanship that finishes it. The lapping process is a critical step in achieving and maintaining superior precision. At ZHHIMG®, we perform this work in our temperature-controlled facilities using a meticulous 5-step process:
- Rough Lapping: The initial stage focuses on achieving the basic flatness and thickness standards.
- Semi-Fine Lapping: This step removes deeper scratches from the rough lapping, bringing the flatness closer to the required standard.
- Fine Lapping: We further refine the surface, ensuring the flatness is within the initial high-precision range.
- Manual Finishing: Our skilled technicians manually finish the surface, meticulously refining the precision until it meets the exact specifications required.
- Polishing: The final step ensures the surface is smooth and has a low roughness value, which is crucial for stable and consistent measurements.
After completing these steps, each tool is placed in a temperature-controlled room for 5-7 days to allow for final stabilization before its final certification. This rigorous process, combined with our use of premium ZHHIMG® Black Granite, ensures that our products not only meet but exceed national and international standards.
Post time: Sep-30-2025

