In the high-stakes world of precision engineering, the difference between a successful production run and a costly batch of scrap often comes down to a few microns. For engineers and quality assurance professionals, the integrity of the measurement environment is paramount. This environment is built upon foundational tools: the surface plate, the straight edge, and the precision indicators that verify geometric truth. At ZHHIMG, we recognize that selecting the right material and tool is not just a matter of preference, but a critical calculation of thermal dynamics and material science.
Granite vs. Steel: The Battle for the Base
The most fundamental debate in the setup of a metrology lab is the choice between granite and steel surface plates. For decades, cast iron and steel were the industry standards. However, the shift toward granite has been driven by the material’s inherent physical properties.
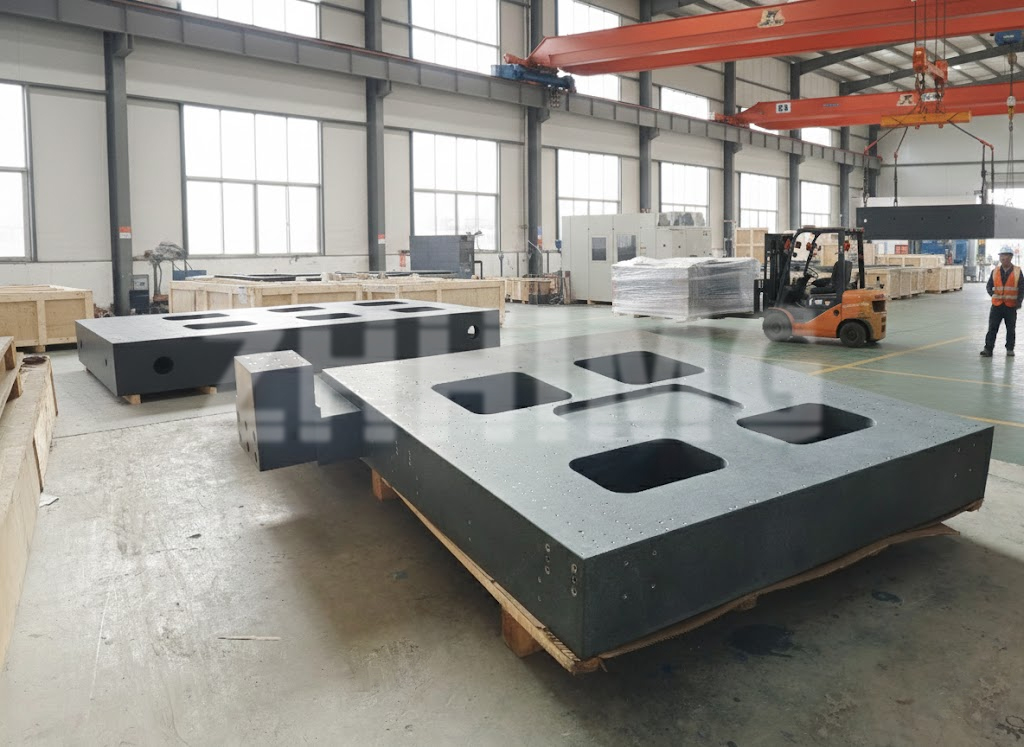
The primary advantage of granite over steel is its superior thermal stability. Steel has a high coefficient of thermal expansion, meaning that even minor fluctuations in room temperature can cause the plate to expand or contract, distorting the reference plane. Granite, particularly the high-density black granite utilized by ZHHIMG, possesses a much lower coefficient. This ensures that the “zero point” remains consistent throughout the work shift.
Furthermore, granite is naturally non-magnetic and rust-proof. In a workshop environment where moisture or magnetic interference from electrical equipment can compromise steel tools, granite remains inert. Perhaps most importantly for longevity, if a granite surface is accidentally nicked, it does not create a “burr.” In contrast, a dent in a steel plate pushes material upward, creating a high spot that ruins the flatness of the entire surface. With granite, a chip simply results in a small pit that does not affect the surrounding flatness.
The Role of the Dial Indicator in Surface Verification
Once a stable base is established, the dial indicator becomes the primary tool for communicating the reality of a part’s geometry to the technician. Whether using a plunger-type or a lever-type test indicator, these instruments are the “eyes” of the metrologist.
The synergy between a granite surface plate and a dial indicator is best seen during flatness and parallelism checks. By mounting the indicator on a stable stand—often featuring a granite base itself to match the thermal profile of the plate—engineers can sweep across a workpiece to detect deviations. The sensitivity of modern digital indicators, often reaching increments of 0.001mm, requires a mounting surface that is free from vibration. The natural damping qualities of granite absorb high-frequency floor vibrations that would otherwise cause “flicker” on a sensitive indicator dial.
Types of Precision Straight Edges and Their Applications
While surface plates provide a 2D reference plane, the precision straight edge is indispensable for 1D linearity checks. Not all straight edges are designed for the same task, and understanding the types available is key to maintaining shop-floor accuracy.
Laboratory-grade granite straight edges are the gold standard for checking the alignment of machine tool ways. Because they are finished on two or four sides to extreme parallelism, they allow for the simultaneous checking of multiple planes.
Steel straight edges, particularly the “I-Beam” or bow-shaped varieties, are still utilized for their high rigidity-to-weight ratio in portable applications. However, for stationary calibration of CNC guideways, granite is preferred due to its weight, which helps it “seat” firmly on the surface being tested, preventing the slight rocking that can occur with lighter aluminum or steel versions.
There are also specialized “Triangular” straight edges. These are specifically designed for checking the 90-degree squareness of machine axes. When combined with a high-resolution dial indicator, a granite square or triangular straight edge can reveal subtle “geometry errors” in a machine’s travel that a standard laser interferometer might overlook during a simple linear move.
Essential Metrology Tools for the Modern Shop
Beyond the plates and edges, a complete metrology suite requires a holistic approach to measurement. This includes precision granite cubes, parallels, and V-blocks. The goal is to create a “closed-loop” of accuracy where every tool used to hold or measure the part shares the same thermal expansion characteristics.
In the aerospace and semiconductor industries, where components are often non-ferrous, the non-conductive and non-magnetic nature of ZHHIMG granite components provides a neutral testing ground. When integrating metrology tools, one must also consider the “Abbe Principle,” which dictates that the displacement measuring scale should be in a straight line with the functional dimension being measured. Utilizing high-precision granite structures as the housing for these measurement scales minimizes the mechanical “sine errors” that occur when tools flex under their own weight.
Maintenance and Longevity of Precision Tools
Investing in premium metrology tools is a long-term strategy. To maintain the accuracy of a granite surface plate or a precision straight edge, regular calibration is non-negotiable. Over time, even the hardest granite can show signs of wear in “hot spots” where parts are frequently loaded.
We recommend a systematic approach: daily cleaning with specialized surface plate cleaners to remove dust and oils, and annual professional resurfacing. For dial indicators, ensuring the contact points are free of debris and the internal mechanisms are calibrated against certified gauge blocks will ensure that the readings you see are the readings you can trust.
At ZHHIMG, we believe that precision is a culture, not just a measurement. By understanding the material science of granite versus steel and selecting the appropriate straight edges and indicators for your specific application, you lay the groundwork for excellence in manufacturing. Whether you are outfitting a new calibration lab or upgrading a production line, the foundation you choose today will dictate the tolerances you can achieve tomorrow.
Post time: Feb-06-2026

