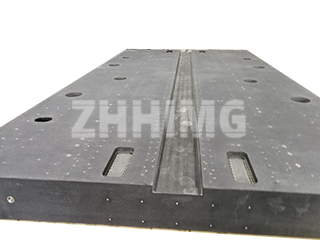
The integrity of any precision manufacturing or metrology process begins with its foundation. At ZHHIMG®, while our reputation is built on Ultra-Precision Granite solutions, we recognize the critical role that Cast Iron Surface Plates and Marking Plates play across global industries. Understanding how to properly install, maintain, and verify the accuracy of these reference tools is not just best practice—it is the difference between quality assurance and costly scrap.
The Absolute Prerequisite: Proper Installation and Uncompromised Structure
Before a cast iron marking plate can deliver its reference accuracy, it must be correctly installed and adjusted. This crucial setup phase is not merely procedural; it directly impacts the plate’s structural integrity and flatness. Improper installation—such as uneven load distribution or incorrect leveling—can violate industry regulations and permanently deform the plate, rendering it unusable. Therefore, only authorized, trained personnel should undertake this task. Violating these procedures is not only non-compliant but can also compromise the very structure of the precision tool.
Marking Plates in the Workflow: The Reference Datum
In any workshop, tools are classified for specific roles: reference, measuring, direct drawing, and clamping. The marking plate is the fundamental reference tool for the scribing process. Scribing itself is the essential operation of translating drawing specifications onto a blank or semi-finished workpiece, establishing clear processing boundaries, reference points, and crucial correction lines. This initial scribing accuracy, typically demanded to be within 0.25 mm to 0.5mm, has a direct and profound impact on final product quality.
To maintain this integrity, the plate must be leveled and securely placed, with the load evenly distributed across all support points to prevent structural stress. Users must ensure the workpiece weight never exceeds the plate’s rated load to prevent structural damage, deformation, and a reduction in work quality. Furthermore, the working surface should be utilized uniformly to prevent localized wear and dents, ensuring longevity.
Inspecting Flatness: The Science of Verification
The true measure of a scribing plate is the flatness of its working surface. The primary method for verification is the Spot Method. This method dictates the required density of contact points within a 25mm square area:
- Grade 0 and 1 Plates: Minimum 25 spots.
- Grade 2 Plates: Minimum 20 spots.
- Grade 3 Plates: Minimum 12 spots.
While the traditional technique of “scraping two plates against each other” may ensure a tight fit and surface intimacy, it does not guarantee flatness. This technique can result in two perfectly mating surfaces that are, in fact, spherically curved. True straightness and flatness must be verified using more rigorous methods. Straightness deviation can be quantified by moving a dial indicator and its support stand along a known straight reference, such as a precision right-angle ruler, across the plate’s surface. For the most demanding measurement plates, the Optical Plane Method utilizing optical interferometry is employed to verify accuracy at the sub-micron level.
Defect Handling: Ensuring Longevity and Compliance
Marking plate quality is governed by strict regulatory frameworks, such as the JB/T 7974—2000 standard in the machinery industry. During the casting process, defects like porosity, sand holes, and shrinkage cavities can occur. The proper handling of these inherent casting defects is crucial for the plate’s service life. For plates with an accuracy grade lower than “00,” certain repairs are permitted:
- Small defects (sand particles with a diameter less than 15mm) can be plugged with the same material, provided the plug’s hardness is lower than the surrounding iron.
- The working surface should have no more than four plugging points, separated by a distance of at least $80\text{mm}$.
Beyond casting flaws, the working surface must be free from any use-affecting rust, scratches, or dents.
Maintenance for Enduring Accuracy
Whether the reference tool is a Cast Iron Marking Plate or a ZHHIMG® Granite Surface Plate, maintenance is simple yet vital. The surface must be kept clean; when not in use, it should be thoroughly cleaned and coated with a protective oil for rust prevention and covered with a protective cover. Usage should always be conducted in a controlled environment, ideally at an ambient temperature of (20± 5)℃, and vibration must be strictly avoided. By adhering to these strict guidelines for installation, use, and maintenance, manufacturers can ensure their reference planes remain accurate, protecting the quality and integrity of their final products.
Post time: Oct-31-2025

