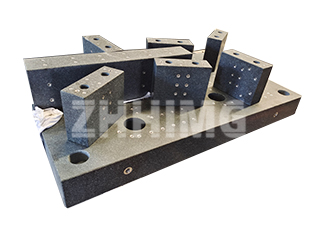
Granite surface plates are essential precision reference tools in mechanical engineering, metrology, and laboratory testing. Their accuracy directly affects the reliability of measurements and the quality of parts being inspected. Errors in granite surface plates generally fall into two categories: manufacturing errors and tolerance deviations. To ensure long-term precision, proper leveling, installation, and maintenance are necessary.
At ZHHIMG, we specialize in the design and production of high-precision granite platforms, helping industries minimize measurement errors and maintain stable performance.
1. Common Sources of Error in Granite Surface Plates
a) Tolerance Deviations
Tolerance refers to the maximum permissible variation in geometric parameters defined during design. It is not generated in the usage process but set by the designer to ensure that the plate meets its intended accuracy grade. The tighter the tolerance, the higher the manufacturing standard required.
b) Processing Errors
Processing errors occur during manufacturing and may include:
-
Dimensional errors: Slight deviations from the specified length, width, or thickness.
-
Form errors: Macro geometric shape deviations such as warping or uneven flatness.
-
Positional errors: Misalignment of reference surfaces relative to each other.
-
Surface roughness: Micro-level unevenness that can affect contact accuracy.
These errors can be minimized with advanced machining and inspection processes, which is why choosing a reliable supplier is critical.
2. Leveling and Adjustment of Granite Surface Plates
Before use, a granite surface plate must be properly leveled to reduce measurement deviations. The recommended procedure is as follows:
-
Initial placement: Place the granite surface plate on the ground and check for stability by adjusting the leveling feet until all corners are firm.
-
Support adjustment: When using a stand, position the support points symmetrically and as close to the center as possible.
-
Load distribution: Adjust all supports to achieve uniform load-bearing.
-
Level testing: Use a precision level instrument (spirit level or electronic level) to check horizontal status. Fine-tune the supports until the plate is level.
-
Stabilization: After preliminary leveling, let the plate rest for 12 hours, then re-check. If deviations are detected, repeat the adjustment.
-
Regular inspection: Depending on usage and environment, perform periodic recalibration to maintain long-term accuracy.
3. Ensuring Long-Term Precision
-
Environmental control: Keep the granite plate in a temperature- and humidity-stable environment to prevent expansion or shrinkage.
-
Regular maintenance: Clean the working surface with a lint-free cloth, avoiding corrosive cleaning agents.
-
Professional calibration: Schedule inspections by certified metrology specialists to verify flatness and tolerance compliance.
Conclusion
Granite surface plate errors can originate from both design tolerances and machining processes. However, with proper leveling, maintenance, and adherence to standards, these errors can be minimized, ensuring reliable measurements.
ZHHIMG provides premium-grade granite platforms manufactured under strict tolerance control, making them trusted by laboratories, machine shops, and metrology centers worldwide. By combining precision engineering with professional assembly and maintenance guidance, we help clients achieve long-term accuracy and stability in their operations.
Post time: Sep-29-2025

