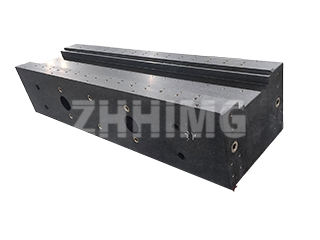
Granite has become a cornerstone material in precision engineering, especially for manufacturing machine bases, measuring instruments, and structural components where stability and accuracy are crucial. The use of granite is not accidental—it results from its unique physical and mechanical characteristics that outperform metals and synthetic composites in many critical applications. However, like all materials, granite also has its limitations. Understanding both the advantages and potential defects of granite components is essential for selecting and maintaining them properly in precision industries.
The primary advantage of granite lies in its outstanding dimensional stability. Unlike metals, granite does not deform or corrode under temperature fluctuations or humidity changes. Its coefficient of thermal expansion is extremely low, which ensures consistent precision even in environments where small temperature shifts occur. In addition, granite’s high rigidity and excellent vibration-damping capacity make it ideal for the foundations of coordinate measuring machines (CMMs), optical instruments, and ultra-precision manufacturing equipment. The natural fine-grained structure of granite provides superior wear resistance and maintains its flatness for years without the need for frequent re-surfacing. This long-term durability makes granite a cost-effective and reliable choice for metrology applications.
Aesthetically, granite also provides a clean, smooth, and non-reflective surface, which is advantageous in optical or laboratory settings. Since it is non-magnetic and electrically insulating, it eliminates electromagnetic interference that can affect sensitive electronic measurements. Moreover, the material’s density and weight contribute to mechanical stability, reducing microvibrations and improving repeatability in high-precision processes.
Despite these strengths, granite components can have certain natural defects or usage-related issues if not carefully controlled during production or operation. As a natural stone, granite may contain microscopic inclusions or pores, which could affect localized strength if not properly selected or processed. That’s why high-grade materials like ZHHIMG® Black Granite are carefully chosen and inspected to ensure consistent density, hardness, and homogeneity. Improper installation or uneven support can also lead to internal stress, potentially causing deformation over time. Additionally, surface contamination such as dust, oil, or abrasive particles can result in micro-scratches that gradually reduce flatness accuracy. To prevent these issues, regular cleaning, stable environmental conditions, and periodic calibration are essential.
At ZHHIMG, every granite component undergoes strict inspection for texture, uniformity, and micro-defects before machining begins. Advanced processing techniques such as precision lapping and temperature-controlled measurement ensure that the final product meets or exceeds international standards like DIN 876 and GB/T 20428. Our professional maintenance and recalibration services further help clients maintain their granite tools in optimal condition for long-term use.
In conclusion, while granite components may exhibit some natural limitations, their advantages in precision, stability, and longevity far outweigh potential drawbacks when produced and maintained properly. By combining the natural properties of high-quality granite with advanced processing technology, ZHHIMG continues to deliver reliable solutions for the world’s most demanding precision measurement and mechanical applications.
Post time: Oct-28-2025

