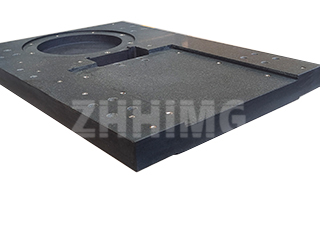
In the world of ultra-precision manufacturing, the performance of granite mechanical components is closely linked to their surface characteristics—particularly roughness and glossiness. These two parameters are more than just aesthetic details; they directly influence the accuracy, stability, and reliability of precision instruments. Understanding what determines the roughness and glossiness of granite components helps engineers and technicians ensure that each part meets the exacting standards required for high-precision applications.
Granite is a natural material composed mainly of quartz, feldspar, and mica, which together form a fine-grained, stable structure ideal for mechanical and metrological applications. The surface roughness of granite mechanical components typically ranges between Ra 0.4 μm to Ra 1.6 μm, depending on the grade, polishing method, and intended use. For example, measuring surfaces of granite plates or bases require extremely low roughness values to guarantee accurate contact with instruments and workpieces. A lower Ra value means a smoother surface, reducing friction and preventing measurement errors caused by surface irregularities.
At ZHHIMG, each granite component is meticulously processed using high-precision lapping techniques. The surface is repeatedly measured and refined until it achieves the desired microflatness and uniform texture. Unlike metal surfaces, which may require coatings or treatments to maintain smoothness, granite achieves its fine roughness naturally through controlled mechanical polishing. This ensures a durable surface that maintains accuracy even after long-term use.
Glossiness, on the other hand, refers to the visual and reflective quality of the granite surface. In precision components, excessive glossiness is not desirable, as it may cause light reflection that interferes with optical or electronic measurements. Therefore, granite surfaces are usually finished with a semi-matte appearance — smooth to the touch but without mirror-like reflection. This balanced gloss level enhances readability during measurement and ensures optical stability in precision instruments such as coordinate measuring machines (CMMs) and optical stages.
Several factors affect both roughness and glossiness, including the mineral composition of the granite, the grain size, and the polishing technique. High-quality black granite, such as ZHHIMG® Black Granite, contains fine, evenly distributed minerals that allow for superior surface finishing with stable gloss and minimal surface waviness. This type of granite also offers excellent wear resistance and dimensional stability, which are vital for maintaining long-term accuracy.
To preserve the surface condition of granite components, proper maintenance is essential. Regular cleaning with a soft, lint-free cloth and non-corrosive cleaner helps remove dust and oil residues that can affect both roughness and gloss appearance. Surfaces should never be rubbed with metal tools or abrasive materials, as these can introduce micro-scratches that alter surface texture and measurement accuracy. With correct care, granite mechanical components can retain their precision surface characteristics for decades.
In conclusion, the roughness and glossiness of granite mechanical components are critical to their functional performance in precision engineering. Through advanced manufacturing processes, ZHHIMG ensures that every granite component meets international standards for surface quality, stability, and longevity. By combining natural granite’s unique physical properties with cutting-edge technology, ZHHIMG continues to support industries where accuracy and reliability define success.
Post time: Oct-28-2025

