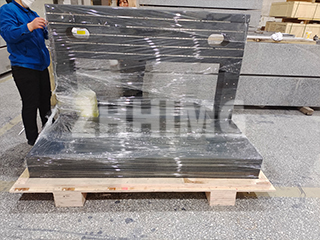
In today’s world of precision manufacturing, accuracy remains the highest pursuit. Whether it’s a coordinate measuring machine (CMM), an optical laboratory platform, or semiconductor lithography equipment, a granite platform is an indispensable cornerstone, and its flatness directly determines the system’s measurement limits.
Many people assume that in this era of advanced automation, granite platform machining must be performed by fully automated CNC machine tools. However, the reality is surprising: to achieve final precision at the micron or even submicron level, the final step still relies on manual grinding by experienced craftsmen. This isn’t a sign of technological backwardness, but rather a profound fusion of science, experience, and craftsmanship.
The value of manual grinding lies primarily in its dynamic correction capabilities. CNC machining is essentially a “static copy” based on the machine tool’s inherent accuracy, and it cannot constantly correct for minor errors that occur during machining. Manual grinding, on the other hand, is a closed-loop operation, requiring craftsmen to continuously inspect the surface using tools such as electronic levels, autocollimators, and laser interferometers, and then perform local surface adjustments based on the data. This process often requires thousands of measurements and polishing cycles before the entire platform surface is gradually refined to an extremely high level of flatness.
Secondly, manual grinding is equally irreplaceable in controlling granite’s internal stresses. Granite is a natural material with a complex internal stress distribution. Mechanical cutting can easily disrupt this balance in a short period of time, resulting in slight deformation later on. Manual grinding, however, uses low pressure and low heat. After grinding, the craftsman lets the workpiece rest, allowing the material’s internal stresses to naturally release before continuing with corrections. This “slow and steady” approach ensures the platform maintains stable precision over long-term use.
Furthermore, manual grinding can create isotropic surface properties. Mechanical machining marks are often directional, resulting in varying friction and repeatability in different directions. Manual grinding, through the craftsman’s flexible technique, creates a random and uniform distribution of wear marks, resulting in consistent surface quality in all directions. This is particularly important for high-precision measurement and motion systems.
More importantly, granite is composed of a variety of minerals, such as quartz, feldspar, and mica, each with distinct hardness variations. Mechanical grinding often results in over-cutting of soft minerals and protrusion of hard minerals, creating microscopic unevenness. Manual grinding, on the other hand, relies on the craftsman’s experience and feel. They can constantly adjust the force and angle during the grinding process, maximizing the balance between variations in the minerals and achieving a more uniform and wear-resistant work surface.
In a sense, the processing of high-precision granite platforms is a symphony of modern precision measurement technology and traditional craftsmanship. CNC machines provide efficiency and the foundational shape, while the ultimate flatness, stability, and uniformity must be achieved manually. As such, every high-end granite platform embodies the wisdom and patience of human craftsmen.
For users who pursue ultimate precision, recognizing the value of manual grinding means choosing a reliable material that will stand the test of time. It’s more than just a piece of stone; it’s the foundation for ensuring the ultimate precision in manufacturing and measurement.
Post time: Sep-23-2025

