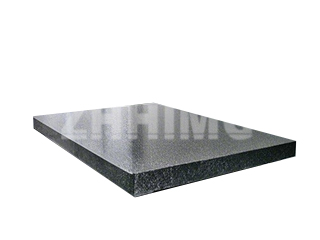
The global race toward ultra-precision—from advanced semiconductor manufacturing to cutting-edge aerospace metrology—demands perfection at the foundational level. For engineers selecting a granite precision platform, the question isn’t whether to check the flatness and uniformity of the working surface, but rather how to define and rigorously measure this most fundamental characteristic. At ZHONGHUI Group (ZHHIMG®), we know that any error in the reference plane translates directly into costly errors in the final product.
The granite platform is, quite simply, the zero-reference plane for every measurement, alignment, and assembly process that follows. If this foundation is compromised, the integrity of your entire system is lost.
Beyond Flat: Understanding Uniformity and Repeat Reading
While the concept of “flatness”—the distance between two parallel planes encompassing the entire surface—is straightforward, true precision relies on the concept of uniformity. A surface can meet an overall flatness tolerance but still contain localized “hills and valleys.” This is why engineers must evaluate Repeat Reading Accuracy.
Repeat reading is the maximum variation observed when a comparator gauge is moved across the surface, checking the same point. This critical measurement verifies the local dimensional stability and consistency across the entire platform. Without tight control over this metric, high-speed linear motors might experience positioning errors, and air bearing stages could suffer non-uniform film pressure, leading to disastrous crashes or motion drift.
This is where the material science of ZHHIMG® Black Granite truly separates itself. Its superior density ≈3100 kg/m³) and innate stability, combined with our proprietary curing and finishing processes, actively minimize these localized deviations. We don’t just achieve flatness; we ensure the surface is uniformly smooth to nanometer levels.
The Global Standard for Unquestionable Quality
Any precision platform must be validated against a global benchmark. We ensure our components not only meet but exceed the strict requirements set by standards such as the ASME B89.3.7 in North America and DIN 876 in Europe, particularly the demanding Grade 00.
Achieving this level of certified accuracy is impossible without rigorous internal quality control. Our verification process is an engineering marvel in itself. Every ZHHIMG® platform is evaluated in our vibration-isolated, temperature-controlled metrology lab—a facility designed with anti-vibration trenches and thick concrete floors to guarantee an environment of absolute stability.
Measurement is conducted using certified, traceable equipment like Renishaw Laser Interferometers and WYLER electronic levels. We do not rely on basic inspection tools; we employ the same level of technology used by the world’s national metrology institutes to ensure unquestionable traceability in our documentation.
Hand-Lapping: The Human Element in Nanometer Precision
Perhaps the most unique factor in ZHHIMG®’s ability to deliver unmatched uniformity is our reliance on the human touch. While advanced CNC machinery roughs the surface, the final, most crucial stage is performed by our team of master craftsmen, many of whom possess over three decades of specialized experience in hand lapping.
These artisans are, as our customers call them, “walking electronic levels.” They use their decades of acquired tactile knowledge to fine-tune the surface to a precision that automated systems simply cannot replicate, effectively smoothing out micro-deviations to achieve that sought-after sub-micron flatness. This blend of advanced technology and unparalleled manual skill is the secret behind the ZHHIMG® difference.
When you select a granite precision platform, you are choosing your ultimate reference plane. For applications across semiconductor lithography, high-speed metrology, and ultra-precision CNC machining, choosing ZHHIMG® ensures you are building on a foundation of certified, enduring dimensional stability.
Post time: Oct-17-2025

