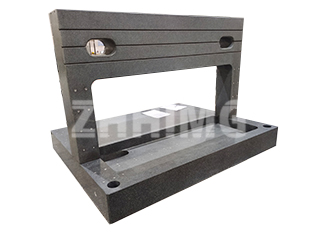
In the world of ultra-precision manufacturing and metrology, the reference surface is everything. At ZHHIMG®, we often encounter the question: why does a simple piece of natural stone—our Precision Granite Inspection Platform—consistently outperform traditional materials like cast iron, maintaining accuracy that rivals the most advanced machinery?
The answer lies in a remarkable synergy of geological history, inherent material properties, and meticulous craftsmanship. A granite platform’s ability to sustain high precision under the most demanding conditions is not a coincidence; it is a fundamental consequence of its non-metallic nature and billions of years in the making.
1. The Power of Natural Aging: An Unshakeable Foundation
Our superior granite material is sourced from select underground rock layers that have undergone natural aging for hundreds of millions of years.This intense geological process guarantees an accurate structure and uniform texture with exceptional stability. Unlike fabricated materials that may exhibit residual internal stresses that creep over time, our granite’s shape is inherently stable. This means that once the platform is precision-lapped, there is virtually no concern for long-term deformation due to internal material changes or even normal temperature fluctuations. This dimensional fidelity is the cornerstone of its high precision.
2. Superior Physical Properties: The Non-Metallic Advantage
The true genius of a granite inspection platform lies in the absence of the shortcomings found in metal. Granite is a non-metallic material, offering a suite of advantages critical for metrology:
- Non-Magnetic: Granite has no magnetic reaction. This is paramount for inspecting precision instruments and electronic parts, as it completely eliminates magnetic interference, ensuring clean and accurate readings.
- Corrosion Resistance: It is inherently rust-resistant and highly resistant to acids and alkalis. This eliminates the maintenance burden (e.g., oiling) associated with cast iron and ensures the reference surface remains pristine even in humid or chemically sensitive laboratory environments.
- High Hardness and Wear Resistance: With a hardness often equivalent to HRC>51 (2–3 times that of cast iron), the platform is incredibly wear-resistant. If the granite surface is accidentally struck by a heavy object, the material will typically see localized chipping rather than the plastic deformation and resulting high spots common on metal plates. This feature allows the platform to maintain its original precision, even after minor incident.
3. Stability Under Load: Fine Structure and High Density
Through rigorous physical testing and selection, ZHHIMG® utilizes granite with a fine crystal structure and a compressive strength ranging from 2290 to 3750 kg/cm².This high strength allows the platform to maintain its high precision under heavy loads without succumbing to deformation. Our ZHHIMG® Black Granite (density ≈ 3100 kg/m³) is renowned for its uniform texture and high density, which contributes to its exceptional vibration damping capabilities. When precision measurements are being taken, this dense, hard foundation ensures minimal transfer of external vibrations, further safeguarding the accuracy of the readings.
In essence, a Precision Granite Inspection Platform is the ultimate reference tool because its properties—naturally aged stability, non-magnetic neutrality, and superior hardness—surpass those of cast iron and steel. Combined with ZHHIMG®’s promise of No cheating, No concealment, No misleading in our manufacturing and finishing processes, users receive a foundation that provides high and stable accuracy for decades.
Post time: Nov-06-2025

