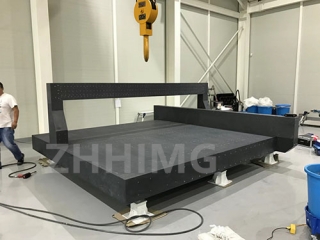
Assembling, testing, and calibrating a granite assembly is an essential process in semiconductor manufacturing. This process ensures that all the components of the device are working properly, and the assembly is ready to be used in the production line. In this article, we will go through the steps required to assemble, test and calibrate a granite assembly.
Step 1: Gathering the Materials
To begin the process, you will need to gather all the necessary materials, including the granite base, mounting components, and the device parts. Ensure that all components are available, and they are in good condition before commencing the assembly process.
Step 2: Prepare the Granite Base
The granite base is a critical component of the assembly. Ensure that it is clean and free from any dirt, dust, or debris that might cause the device to malfunction. Use a soft cloth to clean the surface thoroughly.
Step 3: Mount the Device
Carefully mount the device on the granite base, ensuring that it is centered correctly. Use the mounting components provided to secure the device in place. Make sure that the device is held securely and tightly in place to avoid any movement that may cause damage to the assembly.
Step 4: Ensure proper Alignment
Check the alignment of all the components to ensure that they are correctly aligned. Ensure that the device is mounted perpendicular to the granite base to ensure accurate calibration.
Step 5: Test the Assembly
Testing is an essential part of the calibration process. Connect the device to the appropriate power source and turn it on. Observe the device as it runs and checks its functionalities. Ensure that all the components are working correctly to avoid any errors in production.
Step 6: Calibration
Calibration is the most crucial part of the assembly process. Conduct a thorough calibration of the device to ensure its accuracy. Use appropriate calibration tools to establish the correct settings for the device based on the manufacturer's specifications. Follow the calibration procedure to ensure that all settings are precise.
Step 7: Verification
Verify the assembly's performance by testing it again after the calibration process. Ensure that the device performs as expected and that all the settings are accurate. Verify that the device can produce the required output with the highest accuracy possible.
Conclusion
In conclusion, assembling, testing, and calibrating a granite assembly is essential for the semiconductor manufacturing process. It ensures that the device is operating accurately, and production is successful. By following these steps, you can create a functional granite assembly that will meet your production needs. Remember to always ensure that the materials used in the assembly process are of the highest quality to guarantee optimal performance.
Post time: Dec-06-2023

