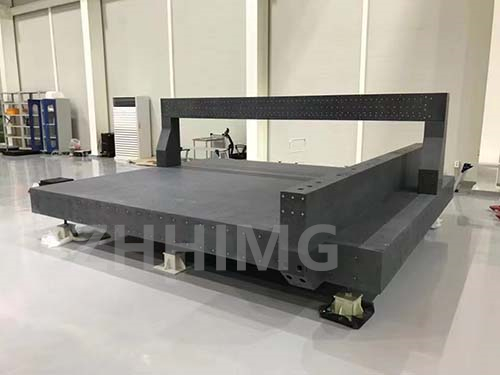
When it comes to precision assembly devices, quality and accuracy of assembly becomes very important. One method to ensure precision in assembly is by using a granite base. A granite base is a flat granite surface used as a platform to assemble and align precision devices. This article aims to illustrate the process of assembling, testing, and calibrating a granite base.
Assembling the granite base:
Firstly, it is essential to ensure that the granite surface is clean and free of debris. One can clean the surface with a lint-free cloth and a solution of water and rubbing alcohol or granite cleaner. After cleaning, verify that the surface is levelled, meaning it lies flat on all edges. Using a spirit level, tilt the stone in different directions, and adjust the height of the supports underneath to maintain balance. Perfectly levelling ensures accuracy when performing measurements.
Testing the granite base:
After you have assembled the base, the next step is to test it. To verify its flatness, place a machinist straight edge or an engineer's square on the granite surface. If there are any gaps between the straight edge and the granite surface, it indicates the stone is not flat. When testing, roll the straight edge in different directions to ensure a consistent fit. An uneven and non-flat granite surface could cause errors in measurements, resulting in poor alignment.
Calibrating the granite base:
Calibration is essential before assembling precision devices on the granite surface. To calibrate, one needs to establish a reference point on the stone surface. Set up a dial indicator on a stand and place it on the granite surface. Slowly move the indicator's probe across the surface and take readings at different points. Ensure the base is levelled to prevent discrepancy readings due to unevenness. Record these values to plot a contour map of the granite surface's topography. Analyze the map to understand any high point or low point on the surface. Low points will require shimming, whereas high points will need to be ground down. After correcting these issues, retest the surface to verify its accuracy.
Conclusion:
Precision assembly devices require a flat and stable surface to ensure reliable and accurate measurements. Granite base is an ideal choice as it has excellent thermal stability, rigidity, and vibration damping properties. Assembling, testing, and calibrating a granite base are essential steps in ensuring accuracy in assembly. With these steps, one can guarantee that the granite base will provide a stable platform for precision assembly devices, allowing them to function at their best performance.
Post time: Nov-21-2023

