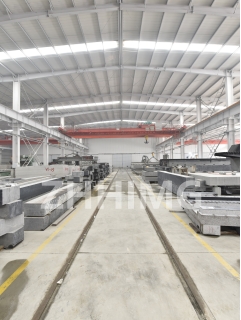
Granite machine bases are heavily used in wafer processing equipment products due to their superior properties such as high stiffness, stability, and precision. Assembling, testing, and calibrating a granite machine base is a critical process that demands utmost attention to detail, precision, and accuracy. In this article, we will discuss the step-by-step process of assembling, testing, and calibrating a granite machine base for wafer processing equipment products.
Assembling
The first step is to prepare the granite surface plate, base, and column for assembly. Make sure that all the surfaces are clean, dry, and free of any debris, dust, or oil. Insert the leveling studs into the base and place the surface plate on top of it. Adjust the leveling studs so that the surface plate is horizontal and level. Make sure that the surface plate is flush with the base and column.
Next, install the column on the base and secure it with bolts. Use a torque wrench to tighten the bolts to the manufacturer's recommended torque value. Check the level of the column and adjust the leveling studs if necessary.
Finally, install the spindle assembly on the top of the column. Use a torque wrench to tighten the bolts to the manufacturer's recommended torque value. Check the level of the spindle assembly and adjust the leveling studs if necessary.
Testing
After assembling the machine base, the next step is to test its functionality and accuracy. Connect the power supply and turn on the machine. Make sure that all the components such as motors, gears, belts, and bearings are functioning properly and without any abnormalities or unusual noises.
To test the accuracy of the machine, use a precision dial indicator to measure the runout of the spindle. Set the dial indicator on the surface plate, and rotate the spindle. The maximum permissible runout should be less than 0.002 mm. If the runout is greater than the permissible limit, adjust the leveling studs and check again.
Calibration
Calibration is the critical step in ensuring the accuracy and precision of the machine base. The calibration process involves testing and adjusting the machine's parameters, such as speed, positioning, and accuracy, to ensure that the machine meets the manufacturer's specifications.
To calibrate the machine, you will need a calibration tool, which includes a laser interferometer, a laser tracker, or a ballbar. These tools measure the machine's motion, position, and alignment with high accuracy.
Start by measuring the machine's linear and angular axes. Use the calibration tool to measure the machine's motion and position over a specified distance or angle. Compare the measured values with the manufacturer's specifications. If there is any deviation, adjust the machine's parameters, such as the motors, gears, and drives, to bring the measured values within the permissible limits.
Next, test the machine's circular interpolation function. Use the calibration tool to create a circular path and measure the machine's motion and position. Again, compare the measured values with the manufacturer's specifications and adjust the parameters if necessary.
Finally, test the machine's repeatability. Measure the position of the machine at different points over a specified period. Compare the measured values and check for any deviations. If there are any deviations, adjust the machine's parameters and repeat the test.
Conclusion
Assembling, testing, and calibrating a granite machine base for wafer processing equipment products is a critical process that requires patience, attention to detail, and precision. By following these steps, you can ensure that the machine meets the manufacturer's specifications and functions with accuracy, stability, and precision.
Post time: Dec-28-2023

