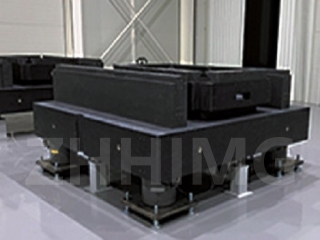
The use of granite in precision processing devices has been a growing trend in recent years. Granite is a material that has excellent stability, stiffness, and precision, making it an ideal choice for mechanical components in precision processing devices. Assembling, testing and calibrating granite mechanical components require special attention to detail as they play a critical role in ensuring the accuracy and efficiency of the devices.
In this article, we will discuss the step-by-step process for assembling, testing and calibrating granite mechanical components for precision processing device products.
Step 1: Pre-assembling Preparation
Before assembling the granite mechanical components, it is essential to ensure that all parts are clean and free from any form of contamination. Any dirt or foreign material present on the surface of the components could affect their accuracy and precision.
Step 2: Assembling the Granite Mechanical Components
Next, the granite mechanical components are assembled according to the manufacturer's instructions. It is important to ensure that the assembly is done correctly and that no components are left out or misplaced. Any misalignment or error during the assembly process may negatively affect the device's performance and accuracy.
Step 3: Testing the Device
Once the granite mechanical components are assembled, the precision processing device is tested to check for accuracy and stability. This step involves testing the device under a controlled environment to ensure that it meets the highest industry standards of precision and accuracy.
Step 4: Calibration of the Device
After testing the device, it is essential to calibrate it to ensure that it performs optimally and meets the desired level of precision. This step involves adjusting the various settings and parameters of the device until it achieves the required precision and accuracy.
Step 5: Final Inspection
Finally, a comprehensive inspection is performed to ensure that all the components are working correctly and that the device meets the required quality standards. This step involves checking the device's performance under different conditions to ensure that it can deliver the desired level of precision and accuracy consistently.
In conclusion, the assembly, testing and calibration of granite mechanical components for precision processing device products require a great deal of attention to detail and precision. These steps are critical in ensuring that the device can deliver the desired level of performance consistently. They also play a crucial role in maintaining the device's accuracy and efficiency, enhancing its overall reliability and durability. With the right approach, assembling, testing and calibrating granite mechanical components can be a straightforward process that yields high-quality and reliable precision processing devices.
Post time: Nov-25-2023

