
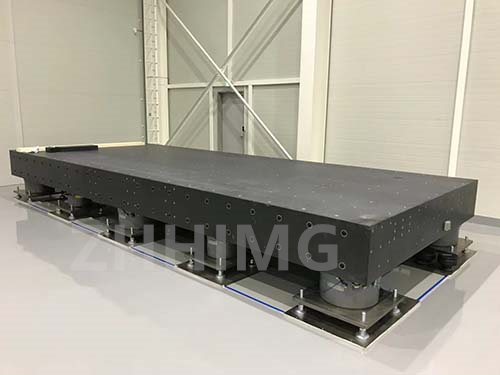
Granite tables are widely used in precision assembly device products to ensure accuracy and reliability in manufacturing and production. Assembling, testing, and calibrating granite tables require careful attention to detail and a systematic approach to ensure they function optimally. In this article, we will provide a step-by-step guide on how to assemble, test, and calibrate granite tables for precision assembly devices.
1. Assembling the granite table
The granite table is usually delivered in sections that need to be put together. The assembly process involves four steps:
Step 1: Preparing the workspace- before you begin the assembly, prepare a clean and dry area, free from dust and debris.
Step 2: Set up the feet - start by attaching the feet to the granite table sections. Make sure that you place the table on a flat surface to avoid any wobbling or tilting.
Step 3: Attach the sections- align the sections of the granite table and use the provided bolts and nuts to hold them together tightly. Make sure that all sections are aligned, and the bolts are tightened evenly.
Step 4: Attach the levelling feet - finally, attach the levelling feet to ensure that the granite table is levelled properly. Make sure that the table is precisely levelled to prevent tilting, as any inclination can affect the accuracy and precision of the assembly device.
2. Testing the granite table
After assembling the granite table, the next step is to test it for any irregularities. Follow the below steps to test the granite table:
Step 1: Check for levelness - use a spirit leveler to check the levelness of the table in both directions. If the bubble is not centred, use the provided levelling feet to adjust the granite table's levelness.
Step 2: Inspect the surface for irregularities - visually inspect the surface of the granite table for any cracks, chips, or dents. Any irregularities on the surface can affect the accuracy of the assembly device. If you notice any issue, address it before proceeding.
Step 3: Measure the flatness - use a high-precision dial gauge and a known flat surface such as a granite master square to measure the flatness of the granite table. Take measurements over the entire surface to check for any dips, valleys or bumps. Record the readings and repeat the measurement to confirm the values.
3. Calibrating the granite table
Calibrating the granite table is the final step in the assembly process. Calibration ensures that the granite table meets your required specifications. Follow the below steps to calibrate the granite table:
Step 1: Clean the surface - Before calibration, clean the surface of the granite table thoroughly using a soft cloth or a lint-free tissue.
Step 2: Mark the reference points - Use a marker to mark the reference points on the granite table. The reference points can be the points where you would place the assembly device.
Step 3: Use a laser interferometer - Use a laser interferometer to calibrate the granite table. A laser interferometer measures the displacement and positioning of the granite table. Measure the displacement for each reference point and adjust the table if necessary.
Step 4: Verify and document the calibration - Once you have calibrated your granite table, verify the calibration to ensure that it meets your specifications. Finally, document all the readings, measurements and adjustments made during the calibration process.
Conclusion
Granite tables are essential for precision assembly device products because they offer stability and precision during the manufacturing process. Proper assembling, testing, and calibration of granite tables are crucial to ensure that they meet your required specifications. Follow the steps outlined in this article to achieve optimal performance from your granite table.
Post time: Nov-16-2023