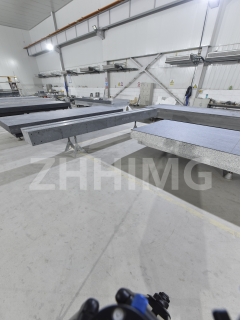
Granite apparatus is an essential tool for accurate measurements in precision manufacturing industries. It is a durable and robust material that can withstand severe conditions. However, over time, the appearance of granite apparatus can get damaged due to constant wear and tear. The accuracy of granite apparatus may also go off track due to excessive use or mishandling. In this article, we will discuss how to repair the appearance of the damaged granite apparatus and recalibrate its accuracy.
Repairing the Appearance of Damaged Granite Apparatus:
Granite apparatus can get damaged due to various reasons like scratches, stains, chips, or cracks. The following are some repair techniques that can improve the appearance of damaged granite apparatus:
1. Scratches: Minor scratches on the surface of granite apparatus can be easily removed by buffing the surface with fine-grit sandpaper or a polishing compound. However, for deeper scratches, professional help is required. The surface can be polished and refinished to remove the scratches.
2. Stains: Granite is susceptible to staining, and it can make the surface appear dull and unappealing. To remove stains, a mixture of hydrogen peroxide and baking soda can be applied to the surface and allowed to sit for a few minutes. Then, the surface can be rinsed with water and wiped dry. For stubborn stains, a poultice made of baking soda and water can be applied to the surface and left overnight.
3. Chips and Cracks: Minor chips and cracks can be filled with epoxy or acrylic adhesive. However, for significant damage, professional intervention is required. The damaged surface can be polished and refinished to restore its appearance.
Recalibrating the Accuracy of Granite Apparatus:
Granite apparatus is known for its accuracy, and any deviation can affect the quality of the products that are being manufactured. The following are some steps that can help recalibrate the accuracy of granite apparatus:
1. Clean the Surface: Before recalibrating, it is essential to clean the surface of granite apparatus thoroughly. Any dirt or debris can affect the accuracy of measurements.
2. Check the Flatness: The flatness of granite can be checked using a precision-grade straight edge and feeler gauges. The straight edge should be placed on the surface and moved around to check for any gaps between the surface and the straight edge. If any gap is present, it indicates that the surface is not entirely flat.
3. Re-Level the Surface: If the surface is not entirely flat, it needs to be re-leveled. A surface plate leveler can be used to adjust the surface until it is entirely flat. The leveler should be placed on the surface, and any gaps should be adjusted using shims or leveling screws until the surface is flat.
4. Check the Squareness: The squareness of granite can be checked using a precision-grade square. The square should be placed on the surface, and any gap should be adjusted until the surface is entirely square.
5. Repeat the Tests: Once the initial calibration is done, the tests should be repeated to ensure that the accuracy is restored.
Conclusion:
Granite apparatus is a valuable tool in precision manufacturing, and it is essential to maintain its appearance and accuracy. With the above repair techniques, the appearance of damaged granite apparatus can be restored. The accuracy of granite apparatus can be recalibrated by following the steps mentioned above. It is always recommended to seek professional help for significant damage or calibration. By maintaining the appearance and accuracy of granite apparatus, we can ensure that we produce high-quality products.
Post time: Dec-21-2023

