
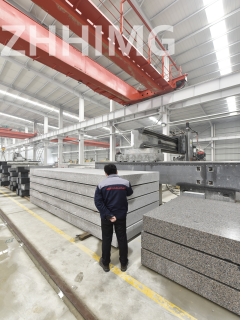
Granite is a popular material for precision assembly devices because of its excellent properties such as high stiffness, low thermal expansion, and low wear. However, due to its brittle nature, granite can be easily damaged if handled improperly. The damaged granite base can affect the accuracy of the precision assembly device, which can lead to errors in the assembly process and ultimately affect the quality of the finished product. Therefore, it is crucial to repair the appearance of the damaged granite base and recalibrate the accuracy as soon as possible. In this article, we will discuss the steps to repair the appearance of the damaged granite base for precision assembly devices and recalibrate the accuracy.
Step 1: Clean the Surface
The first step in repairing the appearance of the damaged granite base is to clean the surface. Use a soft-bristled brush to remove any loose debris and dust from the surface of the granite. Next, use a damp cloth or sponge to clean the surface thoroughly. Avoid using any abrasive materials or chemicals that can scratch or etch the surface of the granite.
Step 2: Inspect the Damage
Next, inspect the damage to determine the extent of the repair required. Scratches or chips on the surface of the granite can be repaired using a granite polish or epoxy. However, if the damage is severe and has affected the accuracy of the precision assembly device, professional help may be required to recalibrate the device.
Step 3: Repair the Damage
For minor scratches or chips, use a granite polish to repair the damage. Begin by applying a small amount of the polish on the damaged area. Use a soft cloth or sponge to gently rub the surface in a circular motion. Continue rubbing until the scratch or chip is no longer visible. Repeat the process on other damaged areas until all damage has been repaired.
For larger chips or cracks, use an epoxy filler to fill the damaged area. Begin by cleaning the damaged area as described above. Next, apply the epoxy filler to the damaged area, making sure to fill the entire chip or crack. Use a putty knife to smooth out the surface of the epoxy filler. Allow the epoxy to dry completely according to the manufacturer's instructions. Once the epoxy has dried, use a granite polish to smooth out the surface and restore the appearance of the granite.
Step 4: Recalibrate the Precision Assembly Device
If the damage to the granite base has affected the accuracy of the precision assembly device, it will need to be recalibrated. Recalibration should only be performed by a professional who has experience with precision assembly devices. The recalibration process involves adjusting the various components of the device to ensure that it is functioning properly and accurately.
In conclusion, repairing the appearance of the damaged granite base for precision assembly devices is essential to ensure the accuracy and quality of the finished product. By following the steps outlined above, you can repair the damaged granite base and restore it to its original appearance. Remember to take care when handling and using precision assembly devices to prevent damage and ensure their longevity and performance.
Post time: Nov-21-2023