
How to Level and Install a Granite Machine Base: Supports, Anti-Vibration Mounts and Common Mistakes
A precision granite base can be ruined before it is ever used — by one careless lift, one badly placed support, or one leveling adjustment made in the wrong order. Granite machine base installation is a discipline, and most of it is common sense applied in the right sequence. This guide walks through installation step by step: arrival inspection, lifting, support layout, leveling, anti-vibration mounting and environment — with a common mistake flagged at every step, because installation errors are almost always predictable and therefore avoidable.
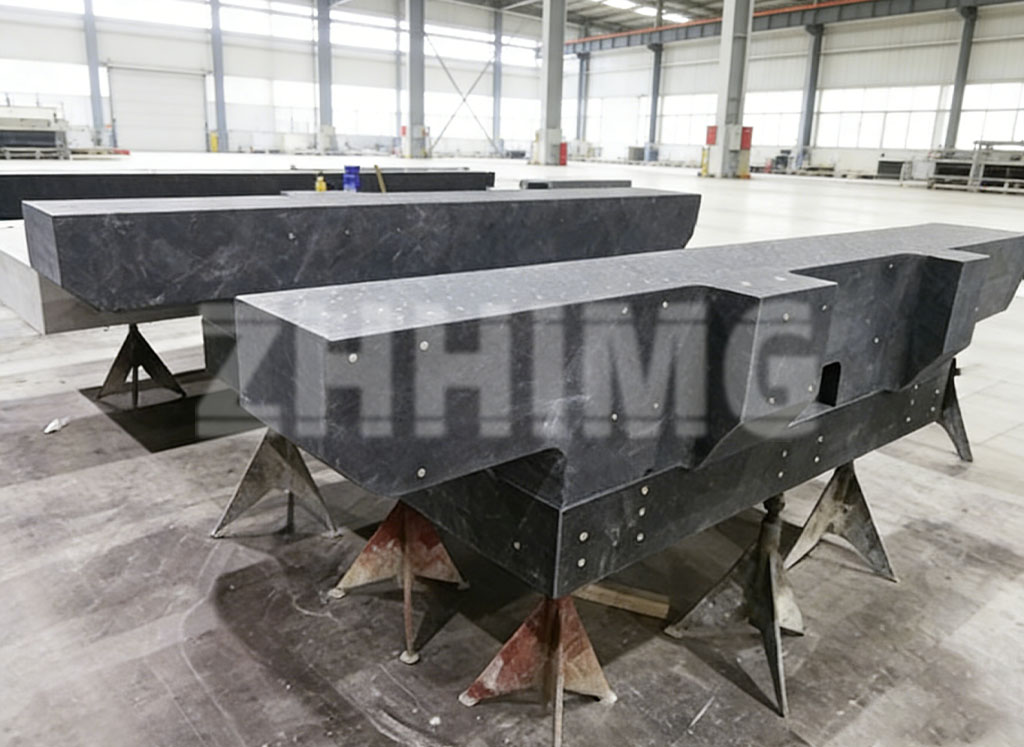
Step 1: Arrival inspection
Before the crate is opened, look at the outside: shock and tilt indicators (if fitted), crate condition, and any signs the unit was set down hard. Then open and inspect: working surfaces for chips and cracks, inserts for looseness or corrosion, and the support or mount hardware against the packing list. Photograph everything before assembly starts — if a claim is needed later, the record exists.
Common mistake: signing the delivery note before inspection. Once signed, transit damage becomes a negotiation instead of a claim.
Step 2: Lifting and moving
Granite is strong in compression and unforgiving under bending. Lift only at the points marked or agreed with the supplier, keep slings off lapped faces (use softeners or dedicated lifting fittings), and never lift a plate flat without support along its span unless the supplier states it is acceptable. Move the base on its crate skids as far as possible; forklifts under a bare stone concentrate load at two lines and can crack it.
Common mistake: improvising lift points. A sling around one end of a long base turns the stone into a beam and loads the middle in tension — the exact stress granite handles worst.
Step 3: Support point layout — why three points matter
Granite bases are designed for a specific support scheme, usually three points, because three points define a plane: each support carries a determinate share of the weight regardless of floor flatness, and the stone is never internally stressed by being forced to bridge between four uneven legs. Four or more supports only work when they are deliberately coplanar (matched, shimmed or on a common frame) — otherwise the base rocks, or worse, sits in permanent internal stress that shows up as flatness drift.
Supports belong close to the designed positions — typically inset from the ends, or at the positions shown on the drawing. Long bases may use multi-point schemes with defined load sharing; the rule is to follow the drawing, not intuition.
Common mistake: adding “extra safety” supports under the middle. On a three-point design, a fourth support under the centre usually lifts the stone off its designed points and inverts the load pattern — the classic cause of mysterious flatness changes after installation.
Step 4: Leveling
Leveling serves two purposes: putting the reference surfaces in the orientation the machine expects, and removing twist. Use proper jack sets and leveling hardware rated for the load, and level with a precision instrument on the reference faces — not a builder’s level on the floor. Adjust in small, alternating steps: raise or lower opposing supports gradually so the stone is never left bridging on one point. Confirm level at several positions and re-check after 24 hours; supports and floors settle.
Common mistake: leveling on the floor instead of on the stone, or tightening one jack fully before touching the others. Both twist the base; the second one can crack it.
Step 5: Choosing anti-vibration mounts
Whether the base needs isolation, and which kind, depends on the environment and the machine:
Passive isolation: rubber or air-damped machine mounts under the support points reduce transmission of floor vibration. Match the mount’s load rating to the actual share each point carries — an undersized mount is stiff and useless, an oversized one sags and changes level.
Air-spring isolators: for precision equipment in vibration-active environments, anti-vibration systems with air springs give much lower natural frequencies and better isolation at low frequencies, at the cost of needing a clean, dry air supply and periodic checks.
Orientation of isolation: isolating the base is not the same as isolating what sits on it. A granite base on stiff mounts can still carry an isolated payload — the system architecture should be decided with the machine design, not improvised on site.
Common mistake: mixing mount types or stiffnesses under one base. Uneven isolation creates tilt and coupling between axes — and the resulting drift is hard to diagnose later.
Step 6: Environment — temperature and floor
Granite barely cares about humidity and chemistry, but temperature gradients bend everything. Keep the base away from direct sunlight, HVAC outlets and heat-producing equipment; a base half in sunshine is a base with a permanent slope. The floor matters too: a support standing on an isolated slab behaves differently from one on the main foundation, and floor vibration spectra decide whether passive mounts are enough. For the tightest environments, coordinate the isolation design with the building’s data rather than guessing.
Common mistake: installing next to a heat source “temporarily” and never moving it. Thermal gradients cause slow, seasonal measurement drift that looks exactly like material instability.
Step 7: Assembly and verification
With the base levelled and settled, proceed to assembly: mount rails, stages and components using the designed datums, and verify geometry on the assembled machine — the base’s installation is finished only when the machine’s geometry checks out. For teams that prefer factory-side assembly, our granite assembly and maintenance service delivers bases pre-assembled and verified, reducing on-site work to placement and leveling.
Common mistake: treating installation as finished when the base is level, before re-verification after 24 hours and after first loading. Settlement changes things; the re-check is what proves the installation.
Installation checklist
| Step | Do | Common mistake |
|---|---|---|
| Arrival | Inspect and photograph before signing | Signing before inspection |
| Lifting | Use marked lift points, protect lapped faces | Improvised slings loading the span |
| Supports | Follow the designed three-point (or specified) layout | Adding a “safety” support under the centre |
| Leveling | Small alternating adjustments, re-check at 24 h | One jack tightened fully first |
| Mounts | Match load ratings; one isolation architecture | Mixing mount types under one base |
| Environment | Avoid sunlight, HVAC and heat sources | “Temporary” placement near heat |
| Verification | Re-verify after settlement and loading | Declaring the job done at leveling |
Installing a granite base soon? Send ZHHIMG® the base dimensions, floor conditions and vibration environment — we will recommend the support and isolation setup, supply matching jacks and mounts, and quote installation support or factory pre-assembly where it saves you time.
Frequently asked questions
Why are granite bases usually supported at three points?
Three points define a plane statically: the load distribution is determinate and the stone is not stressed by floor unevenness. Four or more points require deliberate coplanarity; an unmatched fourth point either rocks or imposes internal stress that shows up as geometry change.
What anti-vibration mount should I use under a granite base?
Start from the environment: measure or estimate floor vibration, then choose passive mounts for moderate conditions and air-spring systems where low-frequency isolation is needed. Match each mount’s load rating to its actual share of the weight — per point, not per base.
Can I level the base with the machine already on it?
Final leveling is usually done with the machine’s weight distributed as it will run, because loads change support deflection. Follow the machine builder’s sequence; for heavy assemblies, level in stages as load is added, then verify after the full load has settled.
How flat should the floor be for installation?
The floor does not need to be metrology-flat — the support and leveling hardware absorb small unevenness — but it must be stable and non-settling. Very uneven floors need shimmed or machined pads under each support so loads stay where the design puts them.
Who is responsible if the base loses flatness after installation?
It depends on cause: transport damage is a delivery claim, a support error is an installation issue, and material faults are warranty matters. This is why the inspection photos, the leveling record and the re-verification measurement matter — they separate the causes and protect both sides.
Post time: Oct-20-2026