
A granite surface plate is a measuring reference, not a general workbench.
Over time, even high-quality precision granite plates can develop wear patterns, local high spots, small chips, scratches, embedded contamination, and flatness deviation. These changes are often gradual. A plate may still look clean and visually flat while no longer providing a reliable datum for height gauges, dial indicators, fixtures, V-blocks, squares, comparators, or calibration work.
The good news is that many worn granite surface plates can be restored. Professional resurfacing, also called re-lapping, can often recover functional flatness and extend the service life of a granite plate. The correct action depends on the condition of the plate, its required accuracy grade, the depth and location of damage, and the inspection results.
A proper maintenance program starts with prevention, continues with routine checks, and uses professional calibration and resurfacing when needed.
Know When Resurfacing Is Needed
Not every mark on a granite surface plate requires immediate repair. Small cosmetic changes may have no meaningful effect on measurement performance. The plate should be assessed when its condition could affect the reference surface.
Common warning signs include:
- Repeated measurements that vary unexpectedly across the plate
- Local wear where the same fixture or gauge is always placed
- Visible scratches, gouges, chips, or impact damage
- Raised burr-like material transfer or embedded particles
- Rust marks from metal components left on the surface
- A plate that has been dropped, heavily loaded, moved, or improperly supported
- Calibration results showing flatness outside the required tolerance
- Difficulty obtaining repeatable height-gauge or indicator readings
The most important trigger is a failed or questionable calibration result. A surface plate may have acceptable overall flatness but poor local repeatability in a frequently used area. Both conditions matter. Overall flatness evaluates the full reference surface, while repeat reading or local-area flatness checks whether small regions provide stable measurement support.
Professional evaluation begins by mapping the plate surface. Technicians identify high areas, low areas, local wear zones, chips, scratches, and edge damage before deciding whether targeted repair or full resurfacing is appropriate.
Check Support Before Repairing the Plate
A granite surface plate can appear out of tolerance simply because it is supported incorrectly.
The plate should rest on its designed support points. Improper support can introduce deflection under the plate’s own weight, particularly on large or thin plates. This may change the measured flatness and lead to unnecessary resurfacing work.
ASME B89.3.7 guidance emphasizes supporting granite surface plates at their design points to minimize deflection and obtain accurate flatness measurements. Depending on size and design, this may involve three-point or engineered multi-point kinematic support arrangements.
Before arranging repair, confirm:
- The plate is installed on the correct stand or support system
- Leveling feet and support points are secure
- The stand is not twisted or damaged
- No packing material, debris, or uneven shims are beneath the plate
- The plate has reached thermal equilibrium with its environment
- Heavy fixtures or stored parts are removed before inspection
- The working surface is clean and dry
If the support system is the source of the problem, resurfacing the granite will not solve the underlying issue.
Cleaning Comes Before Measurement
Contamination can create false readings and accelerate wear.
Dust, abrasive grit, machining chips, dried coolant, oil, adhesive residue, and metal fragments can remain on the surface or become embedded in contact areas. They may affect the seating of a workpiece, height gauge, fixture, or calibration instrument.
Before inspection or repair:
- Remove loose dust and particles with a clean lint-free cloth or suitable non-abrasive cleaning method.
- Remove all fixtures, gauges, V-blocks, and accessories from the plate.
- Clean the surface with an approved granite surface-plate cleaner.
- Avoid aggressive household chemicals, abrasive pads, or unapproved solvents.
- Allow the plate to stabilize after cleaning, particularly if a volatile cleaner has cooled the surface through evaporation.
- Inspect the plate under good lighting for chips, cracks, scratches, oil films, and localized wear.
Industry maintenance guidance recommends cleaning the surface before measurement sessions, keeping the underside of workpieces clean, checking instrument bases, and covering the plate when it is not in use.
Water-based cleaners should be used carefully because moisture can remain in surface features and may contribute to corrosion on metal gauges or fixtures. Rapid solvent evaporation can also cool the granite temporarily, which can affect high-accuracy measurements until the surface returns to thermal equilibrium.
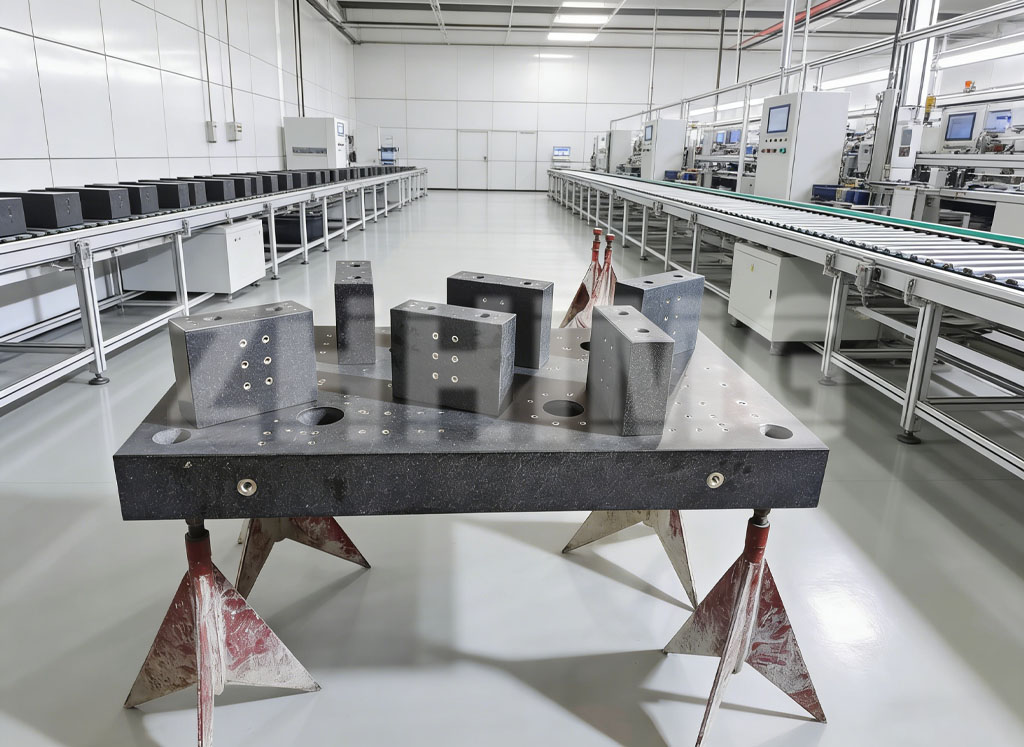
How Professional Resurfacing Works
Granite surface plate resurfacing is a controlled lapping process, not simple polishing.
The goal is to remove the minimum amount of material needed to restore the required geometry. Technicians use a precision lapping plate, abrasive compound—often diamond abrasive—and planned hand or machine-assisted motion patterns. Material removal is gradual and measured.
A typical professional process includes:
- Initial cleaning and visual assessment
- Flatness mapping and repeatability testing
- Identification of high spots, wear zones, and damage
- Local repair of chips or gouges where possible
- Controlled lapping across the working surface
- Progressive use of finer abrasives
- Final surface cleaning
- Repeat flatness and local-area verification
- Calibration documentation, where required
Resurfacing technicians commonly use differential electronic levels, autocollimators, repeat-reading instruments, or mapped grid methods to evaluate flatness before and after repair. A “Union Jack” or Moody-pattern measurement method is commonly used to map the plate across multiple lines.
The lapping process removes very small amounts of material. Properly performed, it restores flatness while preserving the plate’s intended working surface. A heavily damaged plate may require more extensive work, and some severe cracks or structural failures may make replacement more practical than repair.
Repairing Chips, Scratches and Local Damage
Minor scratches and small edge chips may not affect the usable measuring area. Their location is critical.
Damage near the outer edge may be less important than damage in the center of the primary work zone. A shallow scratch may have little effect, while a deep gouge beneath a frequently used gauge path can create repeatability problems.
Localized damage can sometimes be addressed through targeted lapping. The technician removes material only from the affected area and then blends the repair into the overall reference plane. This requires careful control. Aggressive local grinding without full surface verification can create a larger geometry problem than the original scratch.
Do not attempt to repair a precision granite plate with countertop repair products, general polishing pads, sandpaper, hand grinders, or household stone-treatment chemicals. These methods are not suitable for metrology-grade geometry and can permanently alter the surface condition.
For deep cracks, major impact damage, loose inserts, or structural separation in a granite assembly, consult a qualified precision-granite repair provider. The repair method must be evaluated against the intended accuracy grade and use condition.
Calibration After Repair
Resurfacing is not complete until the plate is rechecked.
A repaired granite surface plate should be calibrated or verified against the required grade and standard. The report should identify the plate dimensions, serial number, grade, measurement method, environmental condition, measured flatness, local repeatability where applicable, and traceability of the inspection equipment.
ASME B89.3.7 is the current U.S. standard commonly referenced for granite surface plates, replacing the older GGG-P-463C specification. DIN 876, ISO 8512, JIS, GB, and customer-specific standards may also apply depending on the product and market.
Calibration frequency depends on use. A heavily used plate in a production environment may require verification every six months, while a general quality-control plate is often checked annually. Controlled laboratory plates may have longer intervals if usage is light and conditions are stable. Immediate verification is recommended after suspected impact damage, relocation, or major changes to the support arrangement.
Prevent Wear Before It Starts
A few routine habits can extend the working life of a granite surface plate:
- Lift workpieces instead of dragging them across the surface.
- Keep parts, gauge bases, and fixture feet clean.
- Rotate setup locations to avoid wearing one central area.
- Do not use the plate for welding, deburring, hammering, assembly, or storage.
- Avoid concentrated edge loading and unsupported heavy parts.
- Maintain correct support and leveling.
- Cover the plate when it is not in use.
- Schedule calibration based on use intensity and required accuracy.
- Record any impact, relocation, repair, or suspected measurement issue.
At ZHHIMG®, precision granite surface plates and custom granite components are manufactured for metrology and equipment applications where stable reference geometry matters. For worn plates, the practical decision should be based on inspection data: assess the damage, confirm proper support, determine whether relapping can restore the required grade, and verify the result with documented calibration.
A well-maintained granite surface plate can remain a dependable measurement reference for many years. The key is to treat it as the precision standard it is.
Post time: Aug-18-2026